Sunday, October 29

Paris, Je t’aime…(part one)

I’m back from Paris. And I’m not really liking it. Sure it’s nice to be in my own home again, but what I already knew has been confirmed once again; Paris is the best, most beautiful city in the world.

We stayed our 3 full-planned, beloved days at Hotel Chopin, a charming little hotel located in the small passage Jouffroy, right near the Grands Boulevards. Lovely decorated, welcoming classical music playing in the hallways and great service. I really recommend Hotel Chopin for a short stay in Paris.

Although I didn’t think the whole multiple pages long - ok, actually multiple novels long - list to-do could all have been visited, we yet succeeded to do almost everything that stood on the priority list…

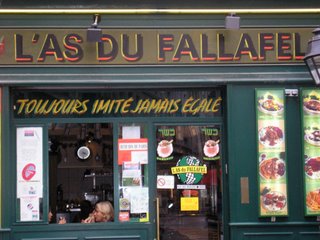
One thing I really wanted to do, was to visit L’as du Falafel.
When I read about it on David Lebovitz’s site, I immediately started to crave. And I can tell you; it is really so good. My saliva production is running up by just seeing the pictures...
Imagine a fresh, soft pita crammed with the best, delicious, hot and crispy chick-pea balls, a generous amount of delicious marinated red and white cabbage, soft aubergine, some fresh slices of cucumber, hummus and the best garlic sauce that isn’t too strong, over dominated or thick at all. That’s L’as du Falafel. There’s no doubt; L’as du Falafel is toujours imite jamais egale. (always imitated, never equalled)


Some other tasty goings were Laduree, Fauchon and the master Pierre Hermé. (but I will come back to these later - they really deserve their own post…)

Another culinary highlight was going to G. Detou and La Grande Epicerie.
G. Detou is a beautiful, little, old and dusty epicerie with the most diverged professional baking supplies. And what about some caramels au beurre sale from Bretagne, or the best blue pigment? (I have a fabulous chocolate layer cake with blue frosting in mind for it’s first project…)
La Grande Epicerie Paris is a gigantic, wonderful culinary shopping Walhalla. I could spend a whole day just looking at everything, walking a bit among the display-windows with fresh pasta and little anti-pasta bites, the bread section, tea and coffee, and the stock of mysterious little pots and jars. Even the meat section looks good and appealing here. So you can understand I couldn’t leave without a little extra something. I got a package of super cute little purple and pink biscuits, that look a bit like mini macarons and I found coloured sugar that I can’t wait to use…


Of course this trip wasn’t just one big eat feast - but it was indeed quite close to it… - I still have a few withdraw symptoms left from all the sugar and chocolate and I can really use a little break and give my body a little peace for a while. But just a little while of course… ;)


L'As du Falafel
34, rue des Rosiers (Marais)
Tel: 01 48 87 63 60
Closed Friday evening and Saturday for Sabbat

G. Detou
58, rue Tiquetonne
Tel: 01 42 36 54 67

La Grande Epicerie Paris
38, Rue de Sèvres
Tel : 01 44 39 83 47


Wednesday, October 25

A Great Weekend

My little half-sister Katoo is the ultimate chocolate monster. She’s almost 4 now and this weekend she came to visit her two big sisters in the city. These two days were way too short and we had, as always, a wonderful time. We absolutely spoiled her to dead now we had the opportunity, we got her some little girly presents, we watched Cinderella, went out to the bakery, danced, watched some more Cinderella and of course devoured a whole lot of chocolate…

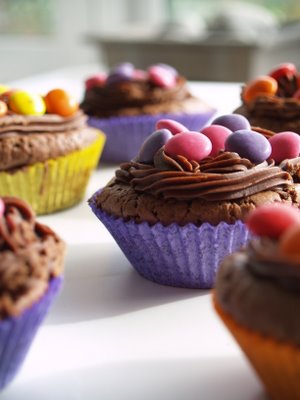
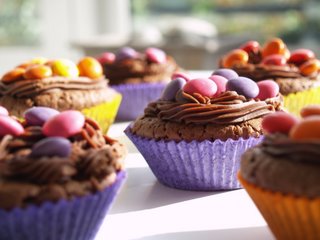
That’s why I made these cupcakes. It’s clear it can’t get more chocolaty or sweeter than this; these cupcakes contain melted chocolate, cacao powder and chocolate chunks, along with the best chocolate frosting and some Smarties on top.
And they tasted absolutely great.
Sweet, brownie-y, and perfectly between dry and moist. They are also very nice without the frosting but that first bite in a frosted one, when your teeth go through the glaze, then the dry, crumbly top and finally threw a delicious moist inside…
Well, nothing will beat that.
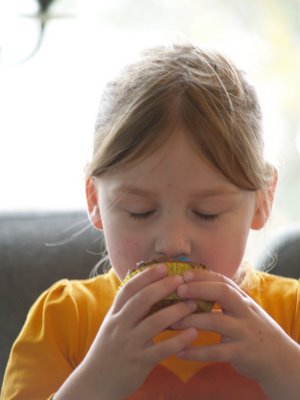
And I’m happy I wasn’t the only one who liked them…

A weekend with cheery Tootje is always a pleasure, but this weekend turned out to be even better when Saturday morning the bell rang and my brand new camera had finally arrived(!)

It’s the Olympus E500 and it’s without a doubt the best toy ever!
I’m now like an annoying paparazzi photographer, walking through the house going click, click, click
And the quality of my pictures - every shot looks like it popped right out a professional photographer catalogue(!)
I love it! Can’t wait to get going and discover all it’s features…=)

Oh yes, one last thing about the cupcakes -
Make sure you buy enough Smarties if you have a specific colour in mind; my plan was to decorate them only with pink Smarties - well, every package contained about 3 pink ones…

A little Smarties fact to end with; Did you know 17 thousand Smarties are eaten every minute in the UK?
You sure can decorate a whole lot of cupcakes with that…(!)
Enjoy! ;)


Chocolaty Chocolate Cupcakes (makes 24 cupcakes)
- 150g (5,4 ounces) bittersweet chocolate
- 250g (1 cup/2 sticks) butter, cut into pieces
- 350g (1 3/4 cups) sugar
- 5 eggs
- 120g (1 cup) flour
- 4 Tbsp cocoa powder, unsweetened
-1 1/2 tsp baking powder
- pinch of salt
- 150g (5,4 ounces) chocolate chips, or bittersweet chocolate, cut into little pieces.

1. Preheat oven to 180°C (350°F) and prepare 24 cupcake cups on a baking sheet.

2. In a large saucepan, melt chocolate and butter while stirring. Add sugar, stir until blend completely, and let cool for 10 minutes.

3. In another bowl, sift together flour, cocoa powder, baking powder, and a pinch of salt. Set aside.

4. With an electric mixer, beat chocolate mixture for about 2 minutes. Add the eggs, one at a time, and make sure each one is completely absorbed before adding the next.

5. Add flour mixture to chocolate mixture and mix well. Scoop into the prepared cupcake cups - this is easy with a ladle - and bake for 25 minutes or until a toothpick comes out clean.

Store in an airtight container or continue with the frosting.


Chocolate frosting (enough for 24 cupcakes)
- 250g (9 ounces) bittersweet chocolate, chopped
- 250ml (1 cup) heavy cream
- 1 tsp vanilla
- 1 Tbsp butter, room temperature
- 300g (2 cups, packed) powdered sugar

1. In a medium saucepan, heat cream until bubbles form around the edge of the pan. Reduce heat and add the chocolate. Let stand for one minute, then stir to combine. Add butter and vanilla and mix well. Remove from heat and let cool for 10 minutes.

2. Sift powdered sugar into the mixture and beat with an electric mixer until combined. Continue to beat until light and creamy. This frosting can be made in advance and kept in the refrigerator. Before piping on the cupcakes, let stand for a few minutes or pop it for 20 sec. in the microwave.

4. Fill pastry bag with the scoopable frosting and pipe onto the cupcakes. Decorate with smarties/m&m’s before the frosting is completely hard. Store in an airtight container.
These cupcakes will stay for an surprisingly long time good - even on the 5th day they taste heavenly…


Tuesday, October 17

Autumn Weather…Time for Cookies

Summer is definitely over. And it happened so quickly;
The streets are rainy and the trees transformed from green to all shades of yellow, orange and red. It’s still dark outside when I wake up in the morning, I need a scarf on when I go to school and I hate that the wind has become so cold and raw…
The plus side however, is that it’s time for candles, tea, electric blankets and wearing comfy ski socks again(!) (and almost time for oliebollen!)

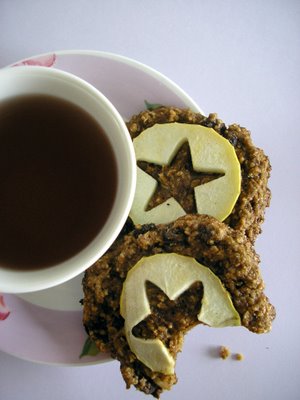
In the summer nothing beats a fresh, sour apple, but with this weather I prefer baking; the wonderful perfumes filling the house, the apples becoming all soft and oozy in the oven, their hotness and perfectly sweetness…

These Apple Cookies are great and have al the above.
They are granola-y and hearty, with delicious crispy edges and a soft apple-ish inside.
I start with the edges, slowly nibble them off, work my way in, and finish with one soft and gooey last bite…
These cookies are robust, sweet and spicy, and really substantial - great for those chilly days…


Apple Cookies (makes about 30)
- 240ml (1 cup) apple juice
- 200g (1 cup) currants
- (250) 2 cups whole-wheat flour
- 1 tsp baking soda
- 1 tsp ground cinnamon
- 1 tsp ground nutmeg
- 1/2 tsp salt
- 225g (1 cup/2 sticks) unsalted butter, room temperature
- 300g (2 cups) dark-brown sugar, firmly packed
- 1 egg, room temperature
- 250g (2 1/2 cups) rolled oats
- 5 crisp and tart apples, I used granny smith
Granulated sugar, for sprinkling (optional)

1. Heat the oven to 180°C (350°F) and line a baking sheet with parchment paper.
Heat cider in a small saucepan to a simmer. Place currants in a bowl and pour the warm cider over them. Let plump at least for 10 minutes.

2. Mix in a small bowl together flour, baking soda, cinnamon, cloves, nutmeg, and salt. Set aside.

3. In the bowl of an electric mixer fitted with the paddle attachment, cream together butter and brown sugar until fluffy. Add egg, and continue beating until well blended.

4. Add the dry ingredients, beating until just combined. Add the currants with half of the cider and oats until just combined. Using the largest holes on a box grater, shred 2 apples directly into the dough, rotating to avoid seeds and core. Stir well to combine.

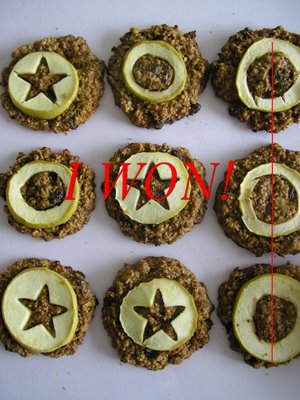
5. Using two spoons, scoop out cookies and place on the prepared baking sheets about 2 inches apart. Using a sharp knife, slice 2 or 3 apples very thinly. Remove core with a cookie cutter or with a knife (you can make all sorts of fun figures…) Place a thinly sliced apple ring on top of each cookie and sprinkle with a pinch of sugar, if desired. Bake in the heated oven until dark brown, 18 to 20 minutes. Repeat with the remaining batter. Let cool completely before storing in an airtight container. Can be stored for 3 days - but be warned, they will soften and soften and...

Monday, October 16

Make you Banana Pancakes...


Scrambled eggs with white beans in tomato sauce, a few slices of buttered toast, a croissant, or a big delicious tower of pancakes…
The possibilities are endless and it’s the most important meal of the day…
Breakfast
Although I’m always quite satisfied with my coffee, yoghurt and freshly squeezed orange juice, this morning it was time for a change.
It was time for pancakes.

I've always loved Jack Johnson’s song Banana Pancakes, and every time I hear it I just start craving for banana pancakes…
So of course I made banana pancakes.
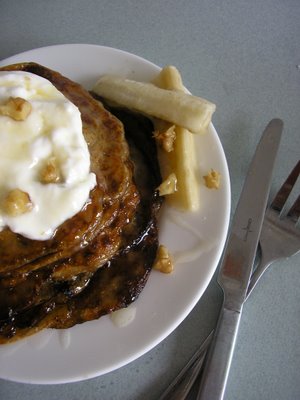
Banana pancakes with buttermilk and a drizzly of honey to be exact.

I’ve eaten pannenkoeken, - A pannenkoek is the Dutch version of a pancake; larger and thinner and served with sugar and treacle… - crepes and blini, but I’d never ever eaten pancakes. let stand for breakfast.
I got my recipe from America’s absolute Baking Queen, Martha Stewart, and I served them with a big dot of crème fraîche and honey instead of maple syrup. This was a lovely - and quite heavy - breakfast that I really enjoyed…

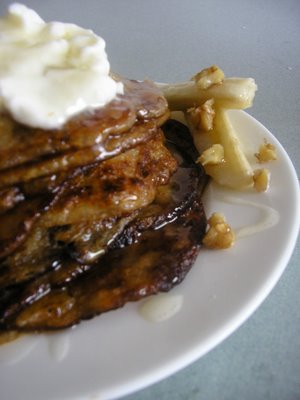
I had a bit of trouble at first with the recipe. or not with the recipe, but jut with pancakes in general; some of my first batch got really messy and burned a bit because I left the heat on too high - luckily I figured it out after a bit of practise and after this I made absolutely beautiful perfect golden-brown pancakes…

They were soft and sweet, had crispy edges and a luscious fluffy and oozy centre from the hot and slightly melted banana slices. Drenched in the honey this big golden-brown heap was a wonderful festive way to start my day…

Banana pancakes (makes 12)
- 120g (1 cup) whole-wheat flour
- 3 Tbsp light-brown sugar
- 1/2 tsp baking powder
- 1/4 tsp baking soda
- 1/4 tsp salt
- 240ml (1 cup) buttermilk
- 1 egg, lightly beaten
- 11/2 Tbsp butter, melted
- vegetable oil
- 2 ripe bananas, thinly sliced
- crème fraîche, maple syrup (or honey) and chopped walnuts, for serving (optional)

1. Preheat oven to 135°C (250°F). In a large mixing bowl, combine flour, sugar, baking powder, baking soda, and salt.
Whisk in buttermilk, egg, and melted butter until batter is well combined and free of lumps.

2. In a large non-stick skillet over medium heat, swirl oil to coat bottom of pan. Working in batches, add batter in 1/4-cup portions. - I got 3 pancakes per time - Top with banana slices, dividing evenly. Cook until golden brown and tiny air bubbles form evenly on top, 2 to 4 minutes. Reduce heat if browning too quickly. Flip pancakes, and continue cooking until slightly puffed, 2 to 5 minutes.
Transfer to a baking sheet and keep warm in the oven while you cook remaining pancakes.

3. Serve pancakes with crème fraîche, honey (or maple syrup) and some chopped walnuts.

Wednesday, October 11

Wednesday Baking IV: No Baking

If you are a regular reader, you’ve already read about my beloved Wednesday Baking.
Clearly, this was too good to be true - schoolwork is really kicking in (and piling up ridiculous quickly…) and my new school period starts already next week.
From now on my Wednesday morning will be spend with maths, physics and chemistry. Great. Definitely an improvement…(!)

My plan was to make something really spectacular, over-the-top and impressive for this last Wednesday Baking.
Something like a 20layercake or perhaps try to make my favourite macarons…
well, this plan failed rather badly as I - strangely - wasn’t at all in the baking mood. I just wanted to spend this last free morning in my pj’s curled upon the couch. Eat far too much kruidnootjes, spoon away something sweet and watch many, many Friends episodes…

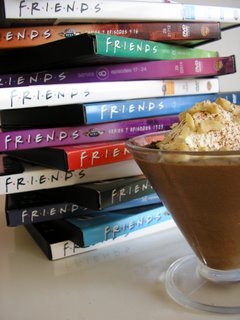
Friends is the best. I even dare to say me and my sister are the biggest Friends fans ever - we have watched every episode approxiately a hundred times (and I can watch them at least another 100 times…) and just like baking, this is one of my favourite, most relaxing things to do.
The last few weeks however, I hadn’t have the time (or peace) to just sit down, do nothing and watch. You can understand this morning was really needed, and I happily relived Ross and Rachel’s drama story…

So this Wednesday Baking Day was really No Baking Day - just something easy, quick, really satisfying and with a good sugar kick was needed today.
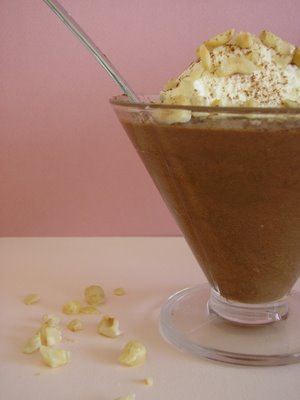
The answer was Chocolate Mousse

Intensely chocolate flavoured, exactly sweet enough and delightfully fluffy, this recipe was great. Pillowy, velvety and melting wonderfully on your tongue, this was exactly what I needed.
My homework will just have to wait a little bit longer…;)


Chocolate and a big pile of friends episodes….
Could this BE any better? ;)


Bitter Chocolate Mousse (makes 8)
- 250g (9oz) good quality, bittersweet chocolate, chopped
- 30ml honey liqueur (or brandy)
- 25g (1oz/2 Tbsp) butter, cut into pieces
- 4 eggs, separated
- 90ml (6 Tbsp) whipping cream
- 45g (3 Tbsp) sugar
- whipped cream, some chopped hazelnuts and cocoa powder to decorate.

1. Place the chocolate and 4 tablespoons (60ml) of water in a medium saucepan. Melt over low heat, stirring until smooth. Remove pan from heat and whisk in the liqueur and butter.

2. With an electric mixer, beat the eggs yolks until thick and creamy, then slowly beat into the melted chocolate until well blended. Set aside.

3. Whip the cream until soft peaks form and stir a spoonful into the chocolate to lighten it. Fold in the remaining cream.

4. In a clean, grease-free bowl, using an electric mixer, beat the egg whites until frothy. Sprinkle over the sugar and continue beating until the whites are stiff and glossy.

5. Using a large metal spoon, stir a quarter of the egg whites into the chocolate mixture, and then gently fold in the remaining whites until just combined.
Gently spoon into 8 individual cups and chill for at least 2 hours until set and chilled.

6. Scoop a big spoon whipped cream (beaten with a tablespoon of sugar) on top, sprinkle some chopped hazelnuts on top and lightly dust with cacao powder.


Sunday, October 8

Spinach Risotto with Goat’s Cheese

For my 25th post, my mum got me a very, very nice present; ‘Cook with Jamie, My Guide to Making You a Better Cook’ !
I read about this new book a few days ago, told my mum I really liked it, and as a surprise she immediately went out and bought it for me… =)

Cook with Jamie (already his 7th book!) is a beautiful - 450 pages thick - kitchen bible and is divided in 6 chapters; salads, pasta, meat, fish, vegetables and desserts.
Each chapter begins with a little info about the ingredient, a good basic technique and some handy tips and tricks. The principle is to first master the basics, be able to make the fundamentals for good authentic food, and than start mixing and experimenting and let all the flavours flow with about 8 different variation recipes, all made from that first basic recipe.

Become Jamie’s student in your own home…(!)

I absolutely love this book. I’ve always liked Jamie Oliver and his TV shows, I think he’s a great guy with his school dinners and 15 project, but I didn’t really like all his commercial stuff; tefal series, flavour shakers, table wear and god knows what.
I’m glad this book is simply about good food, learning and enjoying it.

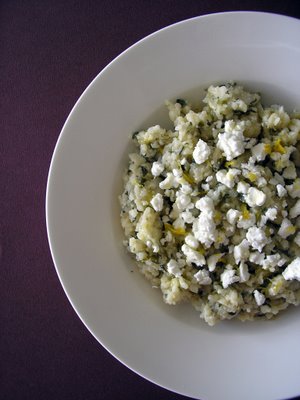
Wanting to use my lovely new book immediately, I made this Spinach Risotto with Goat’s Cheese as a surprise Saturday night dinner.
Making risotto isn’t difficult at all.
You just have to have some timing and patience, since you really have to stand the whole time next to the pan - My rice was cooked exactly long enough; soft and oozy but still with a good bite.

I’m not really used to make something that doesn’t involve baking or isn’t sweet, but I have to say I really like it. Especially if I get an outcome as this…!
Intensely flavoured, slightly perfumed from the wine, a bit cheesy and wonderfully creamy. What’s a better dinner than a big, hot and steamy bowl of risotto mixed with soft spinach, slightly sour goat’s cheese and a bit of tangy lemon??


After making the basic risotto recipe, the rice will be ready for 75%
The idea is you’ll finish it off with a following recipe
Perfect if you have people over for dinner - make the base in advance and just leave it until you need it!


Spinach Risotto with Goat’s Cheese
based on Jamie Oliver’s recipe from Cook with Jamie.
(according to Jamie it serves 8, but if you want a good hearty portion, don’t count on more than 4 or 5 portions!)

ingredients for the basic risotto:
- 1 Litre (1 ¾ pint) vegetable stock
- 2 Tbsp olive oil
- 1 Tbsp butter
- 1 large onion, peeled and finely chopped
- 6 sticks of celery, trimmed and finely chopped
- 600g (1lb 6oz) risotto rice
- 250 ml dry white wine

extra ingredients for the spinach risotto with goat’s cheese:
- 75g (2/3 stick, 1/3 cup) butter
- olive oil
- 1 clove of garlic, peeled and chopped
- nutmeg, for grating
- 250g (9oz) spinach, washed and dried
- sea salt and freshly ground pepper
- 700 ml (1 ¼ pint) vegetable stock
- 1-2 hands freshly grated Parmesan Cheese
- ½ a lemon
- 200g soft goat’s cheese, crumbled
- extra virgin olive oil

Basic risotto:
If you make the risotto in advance, oil a large tray and set aside.

1. Bring the stock to a simmer in a saucepan.
Put olive oil and butter in an other large pan, add onion and celery and cook very gently for about 10 minutes, without colouring, until soft.

2. Add the rice and turn up the heat - keep the rice moving
Pour in the wine and keep stirring all the time until all the alcohol has evaporated, leaving the rice nicely perfumed.

3. Add the stock to the rice a ladle at a time, stirring and waiting until it has been fully absorbed before adding the next. Turn the heat down a bit to prevent cooking the rice to quickly, (the inside will than be very hard!) and continue to add ladlefuls of stock until it has all been absorbed. This takes about 15 minutes. The rice now begins a bit to soften, but is still quite hard.

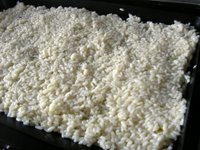
4. Scoop the part-cooked rice out on the waited oiled tray, spread it out evenly and not to thick (otherwise the rice will cook itself!) and put the tray somewhere to cool down.
When it’s completely cooled, scrape it carefully all in a Tupperware container with a lid and keep it in the fridge until you want to use it.
The rice will keep for a couple of days.

Now you’ll have a perfect risotto base. Finish it off with the following recipe;

Spinach Risotto with Goat’s Cheese:

1. Heat a medium saucepan, spoon in a tablespoon of the butter and add a splash of olive oil, the garlic and a good grating of nutmeg.
When the butter has melted, add the spinach. Cook for 5 minutes, moving it until it’s wilted down. A lot of the liquid will cooked away and a dark intensely flavoured spinach will be over. Chop finely and season with salt and pepper to taste. Heat up your stock in a medium saucepan (the same one) and bring to a simmer.

2. Put a different large saucepan on medium high heat and pour in half the stock followed by all your risotto base. Stirring all the time, gently bring to a boil, and cook until most of the stock has been absorbed. Add the rest of the stock a ladle at the time until the rice is cooked. (check and taste when it’s perfect and a real pleasure to eat - still holding it‘s shape but also soft, creamy and oozy)

3. Turn off the heat, and stir in your spinach, butter and parmesan. Add a good squeeze of lemon juice, season with salt and pepper and leave the risotto to rest (with the lid on) for a minute. Fold in half of the goat’s cheese, stir well and scoop your portions on the plates. Finish off with the rest of the goat’s cheese, some lemon zest, a little drizzle of extra virgin olive oil and a bit of grated Parmesan…enjoy!

Thursday, October 5

Wednesday Baking III: Honey and Spice Cake

To keep my tradition going, I started my lovely free morning Wednesday again with some baking.
Because Wednesday Baking seems to be equal for using lots of raisins and cinnamon, I made sure this week’s recipe would also be loaded with both and ended up making a variation on Delia Smith’s Spice Cake.


Spice Cake is a true no fuss cake;
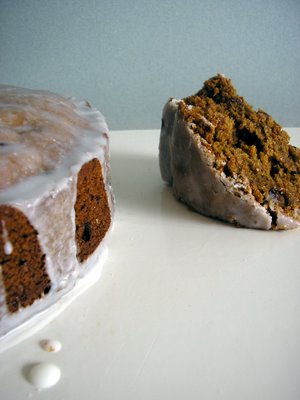
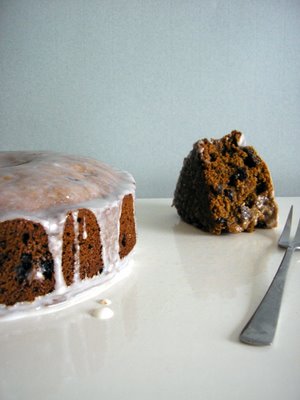
It isn’t very special or difficult to make - and I doubt it will ever win a beauty price - but in its simplicity, this cake is really irresistible and tastes so incredibly good.
If you just want something simple with a special twist; this is definitely your cake.

I substituted the candied peel for raisins and increased the amount of honey. This honey was just faintly traceable but did give it its nice and soft texture.
This cake is crumbly, spicy, extremely flavourful and has a lovely orange hint. The fresh and tangy lemon icing pairs beautifully with it;
perfect with a nice cup of tea for one of those cold autumn days.

p.s.
Tasting Life is silver! Yes, already 25th posts (!) Absolutely nothing, if you compare it with certain other blogs, but I‘m still very glad I even got this far. I keep learning and having fun so… up to the 1000th! ;)


honey and spice cake
- 100 g (1/3 cup) clear, runny honey
- 1 tsp ground ginger
- 2 tsp ground cinnamon
- 225 g (8 ounces) all-purpose flour
- 75 g (3 ounces) golden caster sugar
- finely grated zest 1 orange
- finely grated zest 1 lemon
- 110 g (1 stick/1/2 cup) butter, room temperature
- 1 egg, beaten
- 1 tsp baking soda
- 150g (¾ cup) raisins
icing:
- 175 g (6 ounces) icing sugar
- 2 Tbsp lemon juice + 2 Tbsp warm water

1. Preheat oven to 170°C (325°F) and lightly butter a 20 cm (8 inch) round cake tin.

2. Put the honey in a small bowl. Place this bowl into a saucepan containing almost boiling water and warm up the honey a little. (not too much, just a little)

3. Sift spices and flour into a large mixing bowl. Add sugar, orange and lemon zest. Now add the butter in small pieces. Rub it lightly into the flour with your fingertips, until the mixture becomes crumbly. Using a fork, lightly mix in the beaten egg, followed by the warm honey.
In a small bowl, mix the baking soda with 3 tablespoons of cold water, stir until dissolved, and add it to the cake mixture. beat, quite hard, until the mixture is smooth and soft.
Stir in the raisins and spoon the mixture into the prepared tin, spreading it out evenly. Bake the cake for about 50 minutes, until well risen and firm to the touch.
Let cool for 10 minutes, then turn it out on to a wire rack to cool completely.

4. For the icing; sift the icing sugar into a bowl, add 2 tablespoons of hot water along with the lemon juice and mix to a thin consistency that will coat the back of a spoon. If you don't think it's thin enough add a little more water.
Now place a large plate underneath the cake on the wire rack and pour the icing all over, letting it run down and coat the sides a bit.
Store in an airtight container.


Monday, October 2

Paris Time: Chocolate Éclairs

I love watching TV series while I peel peanuts, my cat Romeo, morning fog, cherries, the smell of Christmas trees, my family -
But I as well love Paris.
Nothing overdramatic or something to exaggerate, but still a kind of special, distinctive feeling which I can not really explain. My tummy flips when I’m daydreaming about living there and I just simply want to be in Paris -

Well, maybe you’ve already noticed my count down here on the right… but in 24 days I will be on my way to Paris; city of lights and love, shopping paradise and gourmet walhalla (!)
I can’t wait to stroll down the Champs Elysee, taking the Paris metro, having some macarons again, sipping on my café au lait, exploring the different arrondissements a bit better and purchase some new winter fashion - which nobody will have here in Holland, wha-ha... -
I’m going for 3 days with my mum and sister and I can’t wait - (and it will be a true miracle if I will get to see and do everything that’s already on my list…)

I’ve only been 2 times in Paris, both for my birthday - when I was 10 and last year, for my 15th birthday. To get (even more) in the Paris mood, I decided to try and make éclairs. Chocolate éclairs.
I only have had 3 or 4 éclairs in my life; all in Paris at Fauchon, Maison du Chocolat and bakery Paul.
So the stakes and expectations were rather high…

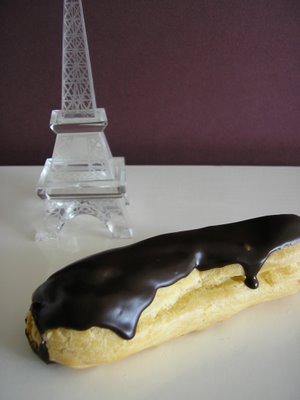
Luckily the whole process went very smoothly and as you’ve already seen on the first photograph…
my own éclairs turned out beautifully and very delicious.
They are not quite yet in the same league as Fauchon’s, but this is truly a great recipe and it did give a real similar feeling as the one from last year…

I actually don’t really like custard or things filled with pastry cream - I’m not that keen on profiteroles or millefeuilles
but this cream filling - o my god
This pastry cream is different, slightly vanilla-infused and it is much lighter, as a result of adding whipped cream into the batter.
This is very nice, and will make it possible to devour 5 or 6 Éclairs easily without needing any pause…

It was a lot of work, definitely if you compare it with the time it took to gobble them down…, but all worth it.
And who knows…if things go as I want, maybe you can have one someday at JULIA instead of Fauchon… ;)


Chocolate Éclairs (makes 30)
Pâte à choux:

- 115g (1stick/½ cup) butter, cut into pieces
- 1 tsp sugar + ½ tsp salt
- 150g (1 ¼ cups) all-purpose flour
- 4 large eggs (plus 1 egg white, if needed - I didn’t need it)

Pastry cream:
- 500ml (2 cups) whole milk
- 100g (½ cup) sugar
- ½ vanilla bean, split lengthwise, seeds scraped (or 1 tsp vanilla extract)
- pinch of salt
- 4 egg yolks
- 75g (¼ cup) cornstarch 2 Tbsp butter, cut into small pieces

Chocolate glaze:
- 170g (6 ounces) bittersweet chocolate, finely chopped
- 565ml (2 ¼ cups) heavy cream
- 1 Tbsp honey

1. Begin with the pastry cream:
In a medium saucepan, combine milk, half of the sugar, vanilla and salt.
Cook over medium heat until mixture comes to a simmer.

In a medium bowl, whisk together the egg yolks, cornstarch, and remaining sugar. Whisking constantly, slowly pour 100ml (½ cup) of the hot-milk mixture into the egg-yolk mixture. Continue adding milk (100ml/½ cup at a time) until it has been incorporated.

Pour mixture back into the saucepan, and cook over medium-high heat, whisking constantly, until it thickens.
Transfer to the bowl of an electric mixture fitted with the paddle attachment. Add the butter, and beat on medium speed until the butter melts and the mixture cools, about 5 minutes.

Cover with plastic wrap, pressing it directly onto the surface of the pastry cream to prevent a skin forming. Refrigerate until chilled, about 2 hours (or up to 2 days!) just before using, beat on low speed until smooth.

2. The pâte à choux:
Preheat oven to 210°C (425°F)
In a medium saucepan, combine butter, sugar, salt and 240ml (1 cup) water. Bring to a boil over medium-high heat, and immediately remove from heat. Using a wooden spoon, quickly stir in the flour until combined.
Return pan to medium-high heat, and cook, stirring constantly, until mixture pulls away from the sides, about 3 minutes.

Transfer mixture to the bowl of an electric mixer fitted with the paddle attachment. Mix on low speed until slightly cooled, about 1 minute.
Increase the speed to medium, and add the whole eggs, one at a time, beating until each is incorporated before adding the next. Test the batter by touching it with your finger and lifting to form a soft peak. If a soft peak does not form, the batter needs more egg. If you have added all the whole eggs and the batter still does not form a soft peak, lightly beat the remaining egg white, and add a little at a time.

3. Making Éclairs out of the pâte à choux:
Line two large baking sheets with parchment paper. With a ruler and a pencil, mark lines about 8 cm (3 ½ inches) long on the parchment paper, spacing them about 5 cm (1 ½ inches) apart. I got 15 on my sheet.
Turn parchment paper over, marked sides down (otherwise your Éclairs will have little lines on their back…!)

Fill a pastry back with pâte à choux and pipe along the lines on the prepared baking sheets - about 1 cm (½ inch) thick. Gently smooth tops with a wet fingertip to ensure even rising.
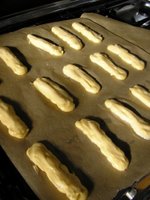


Bake for 10 minutes and reduce oven temperature to 180°C (350°F).
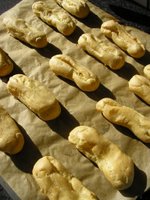
Continue to bake, rotating sheets halfway through, until pastries are golden brown, 25 to 30 minutes more. Transfer pastries and parchment paper to a wire wrack to cool completely.

4. Make the chocolate glaze:
Place chocolate in a heatproof bowl. (large enough that an Éclair could fit in lengthwise)
Heat 190ml (¾ cup) cream and the honey in a small saucepan over medium heat until bubbles begin to appear around the edges, about 5 minutes. Pour mixture over the chocolate. Let stand for 5 minutes, then stir until smooth. Let cool, stirring occasionally, about 5 minutes.

5. Filling the Éclairs:
With the same pastry tip (cleaned of course!) create a small hole on both sides of each shell.

Take the pastry cream out of the fridge and in a medium bowl, stir to soften.
In another bowl, whip the remaining 375ml (1 ½ cups) heavy cream to stiff peaks. Fold the whipped cream into the Pastry Cream in two batches to lighten.
Transfer to a pastry bag fitted with the same plain 1cm (½ inch) tip.
Insert the tip into the opening of each Éclair shell - both sides - and pipe to fill with the whipped pastry cream. You’ll feel when the Éclair is filled - you’ll feel pressure and the shell will be a lot heavier…

Dip the top of each Éclair into the chocolate glaze; let excess drip off, and place, coated sides up, on a wire rack set over a baking sheet.
Refrigerate Éclairs in a single layer in an airtight container until glaze is set, about 20 minutes or up to 2 days…