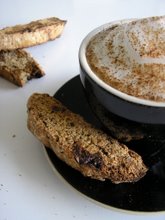
 Some days ago I bought “ La Doce Vita - Sweet Things from the Italian Home Kitchen” by Ursula Ferrigno and it became right away my favourite cooking book. It’s just wonderful for authentic Italian pastry. The book is timeless; filled with delicious recipes for Italian pudding, pastry, pies, cookies, other sweets and of course the famous gelato! There are also many sweet recipes for Italian feasts, for example these Honey Loops; traditionally people eat them only on Christmas Eve. (why for heavens sake just once a year??) Almost every recipe is paired with the most beautiful pictures, and when I see them, I picture myself in lovely sunny Italy. Just sitting outside in front of a local pasticceria, enjoying my morning espresso with some tasty pastry…
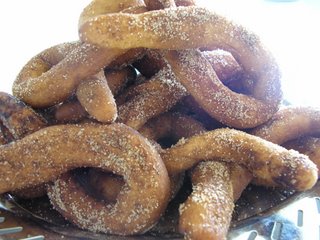
Browsing trough the book, I found the recipe for ‘Honey loops’ and I just couldn’t get the picture of these little sugared cookies out of my mind. They were completely new for me, so I didn’t know what to expect, but I already knew it would be very good. The picture looked so delicious and having dreamed about this high, golden pyramid, drowned in honey and mixed spices last night, this morning I woke up resolute and made my bunch of Honey Loops...
And I was absolutely right. Although it didn’t taste how I thought it would, the Honey Loops were very, very delicious and a real success. The thick spongy inside paired with the sticky sugary outside was just perfect.
The loops self haven’t got a concrete taste. They’re just very soft, dry and doughy. (In fact I don’t think I would have put them in the chapter ‘cookies’…) All the flavour comes from the outside - the sweet honey with the sugar mixture - Therefore it’s really important you use honey from a good quality and aren’t too thrifty with it. Drown those Loops!
Just watch out you don’t make the loops to thin. They are much nicer when they’re big and thick. They’ll have more bite and you’ll notice the difference between textures much better.
The Honey Loops should be eaten the same day (but I doubt that’ll be a problem…)
Honey Loops
(makes 15)
- 15 g fresh yeast or 1 ½ tsp instant yeast with a pinch of granulated sugar.
- 150 ml warm water
- 225 g flour
- pinch of salt
- olive oil, for frying
topping:
- 5 Tbsp honey
- granulated sugar and about 2 tsp of mixed spices to sprinkle on top. (a bit to taste!)
1. Combine the fresh yeast with 2 Tbsp warm water. If you’re using instant yeast, mix it with the sugar in 2 Tbsp warm water. Leave the yeast for 15 minutes on a warm spot, until it becomes a foamy mixture.
2. Sift the flour and salt over a medium bowl. Make a dimple for the yeast mixture and pour it, together with the remnant of warm water in the bowl. Mix until you have dough.
3. Knead the dough, on a flowered surface, for about 10 minutes, until its elastic. After this, place in a lightly oiled bowl, cover the dough with a clean towel and leave it to rest for 20 minutes.
4. Take little pieces of dough, about the size of a chestnut, and roll it out till strings. Place the ends over each other, so that on one side there’ll be a loop. Make 15 loops.
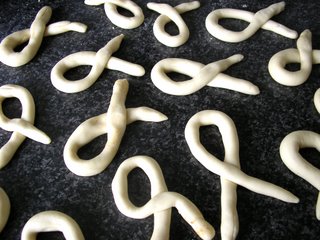
5. Heat the olive oil in a pan until it starts to smoke. Bake the loops five at the same time. Pay good attention; this doesn’t take much time. Take them out when they’re golden and let them leak out on kitchen paper.
6. Make a pyramid out of the loops and cover it with warm honey. Sprinkle generously with sugar and mixed spices.
