Showing posts with label chocolate. Show all posts

Saturday, December 23

Have yourself a...

I know it’s needless to say, but I’ll do it anyway:
It’s really almost Christmas now!
I hope this info is not new or comes with a shock for you, because otherwise I think it would be smart to make some plans and get going (!)
What are you doing this year with Christmas? A 15 courses menu? (it wouldn’t be a surprise with you foodies!) Eating out in a Michelin worthy restaurant? Nothing? Or like us, having a buffet with all kinds of little snacks and other tasty things?
I’m in charge of the dessert section this year -what else?- and decided to go for a few different sweets and desserts, simply because I couldn’t choose…
One of them is this rich chocolate cake with hazelnuts. This is the kind of cake that gets only better and better the longer you wait…perfect for Christmas!

I’m always careful in the kitchen - did you know 58% of all indoor accidents happens in the kitchen?! - but this time I was extra careful, as I still have last Christmas etched on my memory...
Last year me and my mom were hostesses, so on Christmas morning after breakfast and presents, we got back in the kitchen and prepared the final things for dinner. It was nice, but busy and slightly chaotic, and their was still a lot to do.
I was just making a piecrust: butter, flour and sugar were in the bowl, the hand blender was cheery grunting, and the dough was ready to be made into a bal. I putted down the blender and placed my hands in the bowl.
I wanted to have as well the last bit of dough that was sticking in the blender, so I, clearly without thinking, went for it.
10 minutes later we were, me still in my pj’s, at the first aid post. When my finger touched the blade, the power switched on and -luckily!- only my fingernail didn’t survive. Merry Christmas indeed! ;)

So this year I made sure nothing needed the blender…
I haven’t tasted this cake yet of course, -that would be rude!- so I can’t tell you how it tastes, but judging the ingredients, the look, the soft inside versus the crunchy outside, and the incredible smell, it’s only really promising…

Have a great time, merry Christmas everybody!


Chocolate Hazelnut Cake (for 10 till 12 people, adapted from La Dolce Vita)
- 250g (9oz) chocolate (minimum 70%)
-115g (1 stick/½ cup) butter, softened
- 5 eggs, split
- 140g (¾ cup) finely granulated sugar
- 50ml rum/cognac
- 100g fine maizena
- 150g (1 ¼ cups) hazelnuts, roasted

1. Preheat over to 180°C (350°F) and grease and flour a 22cm (9 inch) round cake pan.

2. In a small saucepan, mix the chocolate, broken in little pieces, and the butter over low heat till the chocolate is melted. Take the pan of the fire and let to cool a bit.

3. In a medium bowl, whisk the egg yolks and the sugar together to a thick, creamy mixture. Mix in the chocolate mixture, rum, maizena and hazelnuts until well blended.

4. Whisk the egg whites until stiff (but not dry!) and fold them carefully in the chocolate/hazelnuts mixture.
Scoop this mixture into the prepared cake pan and bake for 30 till 40 minutes.

The cake is ready when it’s dry and firm to the touch, but still a bit wet and silky inside. The top is as well cracked, but that’s how it should be.
Let the cake in it’s for until it’s completely cooled, take out on a serving plate and dust with powder sugar.
Optional: serve with a big dot of mascarpone and strong coffee…Yum!

Wednesday, October 25

A Great Weekend

My little half-sister Katoo is the ultimate chocolate monster. She’s almost 4 now and this weekend she came to visit her two big sisters in the city. These two days were way too short and we had, as always, a wonderful time. We absolutely spoiled her to dead now we had the opportunity, we got her some little girly presents, we watched Cinderella, went out to the bakery, danced, watched some more Cinderella and of course devoured a whole lot of chocolate…

That’s why I made these cupcakes. It’s clear it can’t get more chocolaty or sweeter than this; these cupcakes contain melted chocolate, cacao powder and chocolate chunks, along with the best chocolate frosting and some Smarties on top.
And they tasted absolutely great.
Sweet, brownie-y, and perfectly between dry and moist. They are also very nice without the frosting but that first bite in a frosted one, when your teeth go through the glaze, then the dry, crumbly top and finally threw a delicious moist inside…
Well, nothing will beat that.
And I’m happy I wasn’t the only one who liked them…

A weekend with cheery Tootje is always a pleasure, but this weekend turned out to be even better when Saturday morning the bell rang and my brand new camera had finally arrived(!)

It’s the Olympus E500 and it’s without a doubt the best toy ever!
I’m now like an annoying paparazzi photographer, walking through the house going click, click, click
And the quality of my pictures - every shot looks like it popped right out a professional photographer catalogue(!)
I love it! Can’t wait to get going and discover all it’s features…=)

Oh yes, one last thing about the cupcakes -
Make sure you buy enough Smarties if you have a specific colour in mind; my plan was to decorate them only with pink Smarties - well, every package contained about 3 pink ones…

A little Smarties fact to end with; Did you know 17 thousand Smarties are eaten every minute in the UK?
You sure can decorate a whole lot of cupcakes with that…(!)
Enjoy! ;)


Chocolaty Chocolate Cupcakes (makes 24 cupcakes)
- 150g (5,4 ounces) bittersweet chocolate
- 250g (1 cup/2 sticks) butter, cut into pieces
- 350g (1 3/4 cups) sugar
- 5 eggs
- 120g (1 cup) flour
- 4 Tbsp cocoa powder, unsweetened
-1 1/2 tsp baking powder
- pinch of salt
- 150g (5,4 ounces) chocolate chips, or bittersweet chocolate, cut into little pieces.

1. Preheat oven to 180°C (350°F) and prepare 24 cupcake cups on a baking sheet.

2. In a large saucepan, melt chocolate and butter while stirring. Add sugar, stir until blend completely, and let cool for 10 minutes.

3. In another bowl, sift together flour, cocoa powder, baking powder, and a pinch of salt. Set aside.

4. With an electric mixer, beat chocolate mixture for about 2 minutes. Add the eggs, one at a time, and make sure each one is completely absorbed before adding the next.

5. Add flour mixture to chocolate mixture and mix well. Scoop into the prepared cupcake cups - this is easy with a ladle - and bake for 25 minutes or until a toothpick comes out clean.

Store in an airtight container or continue with the frosting.


Chocolate frosting (enough for 24 cupcakes)
- 250g (9 ounces) bittersweet chocolate, chopped
- 250ml (1 cup) heavy cream
- 1 tsp vanilla
- 1 Tbsp butter, room temperature
- 300g (2 cups, packed) powdered sugar

1. In a medium saucepan, heat cream until bubbles form around the edge of the pan. Reduce heat and add the chocolate. Let stand for one minute, then stir to combine. Add butter and vanilla and mix well. Remove from heat and let cool for 10 minutes.

2. Sift powdered sugar into the mixture and beat with an electric mixer until combined. Continue to beat until light and creamy. This frosting can be made in advance and kept in the refrigerator. Before piping on the cupcakes, let stand for a few minutes or pop it for 20 sec. in the microwave.

4. Fill pastry bag with the scoopable frosting and pipe onto the cupcakes. Decorate with smarties/m&m’s before the frosting is completely hard. Store in an airtight container.
These cupcakes will stay for an surprisingly long time good - even on the 5th day they taste heavenly…


Wednesday, October 11

Wednesday Baking IV: No Baking

If you are a regular reader, you’ve already read about my beloved Wednesday Baking.
Clearly, this was too good to be true - schoolwork is really kicking in (and piling up ridiculous quickly…) and my new school period starts already next week.
From now on my Wednesday morning will be spend with maths, physics and chemistry. Great. Definitely an improvement…(!)

My plan was to make something really spectacular, over-the-top and impressive for this last Wednesday Baking.
Something like a 20layercake or perhaps try to make my favourite macarons…
well, this plan failed rather badly as I - strangely - wasn’t at all in the baking mood. I just wanted to spend this last free morning in my pj’s curled upon the couch. Eat far too much kruidnootjes, spoon away something sweet and watch many, many Friends episodes…

Friends is the best. I even dare to say me and my sister are the biggest Friends fans ever - we have watched every episode approxiately a hundred times (and I can watch them at least another 100 times…) and just like baking, this is one of my favourite, most relaxing things to do.
The last few weeks however, I hadn’t have the time (or peace) to just sit down, do nothing and watch. You can understand this morning was really needed, and I happily relived Ross and Rachel’s drama story…

So this Wednesday Baking Day was really No Baking Day - just something easy, quick, really satisfying and with a good sugar kick was needed today.
The answer was Chocolate Mousse

Intensely chocolate flavoured, exactly sweet enough and delightfully fluffy, this recipe was great. Pillowy, velvety and melting wonderfully on your tongue, this was exactly what I needed.
My homework will just have to wait a little bit longer…;)


Chocolate and a big pile of friends episodes….
Could this BE any better? ;)


Bitter Chocolate Mousse (makes 8)
- 250g (9oz) good quality, bittersweet chocolate, chopped
- 30ml honey liqueur (or brandy)
- 25g (1oz/2 Tbsp) butter, cut into pieces
- 4 eggs, separated
- 90ml (6 Tbsp) whipping cream
- 45g (3 Tbsp) sugar
- whipped cream, some chopped hazelnuts and cocoa powder to decorate.

1. Place the chocolate and 4 tablespoons (60ml) of water in a medium saucepan. Melt over low heat, stirring until smooth. Remove pan from heat and whisk in the liqueur and butter.

2. With an electric mixer, beat the eggs yolks until thick and creamy, then slowly beat into the melted chocolate until well blended. Set aside.

3. Whip the cream until soft peaks form and stir a spoonful into the chocolate to lighten it. Fold in the remaining cream.

4. In a clean, grease-free bowl, using an electric mixer, beat the egg whites until frothy. Sprinkle over the sugar and continue beating until the whites are stiff and glossy.

5. Using a large metal spoon, stir a quarter of the egg whites into the chocolate mixture, and then gently fold in the remaining whites until just combined.
Gently spoon into 8 individual cups and chill for at least 2 hours until set and chilled.

6. Scoop a big spoon whipped cream (beaten with a tablespoon of sugar) on top, sprinkle some chopped hazelnuts on top and lightly dust with cacao powder.


Monday, October 2

Paris Time: Chocolate Éclairs

I love watching TV series while I peel peanuts, my cat Romeo, morning fog, cherries, the smell of Christmas trees, my family -
But I as well love Paris.
Nothing overdramatic or something to exaggerate, but still a kind of special, distinctive feeling which I can not really explain. My tummy flips when I’m daydreaming about living there and I just simply want to be in Paris -

Well, maybe you’ve already noticed my count down here on the right… but in 24 days I will be on my way to Paris; city of lights and love, shopping paradise and gourmet walhalla (!)
I can’t wait to stroll down the Champs Elysee, taking the Paris metro, having some 
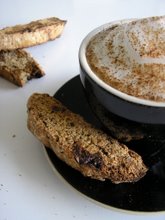
macarons again, sipping on my café au lait, exploring the different arrondissements a bit better and purchase some new winter fashion - which nobody will have here in Holland, wha-ha... -
I’m going for 3 days with my mum and sister and I can’t wait - (and it will be a true miracle if I will get to see and do everything that’s already on my list…)

I’ve only been 2 times in Paris, both for my birthday - when I was 10 and last year, for my 15th birthday. To get (even more) in the 
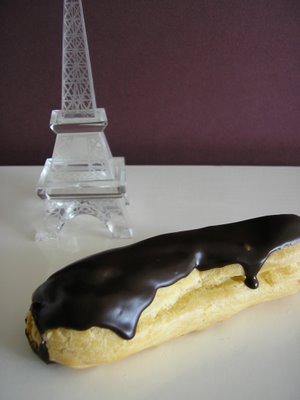
Paris mood, I decided to try and make éclairs. Chocolate éclairs.
I only have had 3 or 4 éclairs in my life; all in Paris at Fauchon, Maison du Chocolat and bakery Paul.
So the stakes and expectations were rather high…

Luckily the whole process went very smoothly and as you’ve already seen on the first photograph…
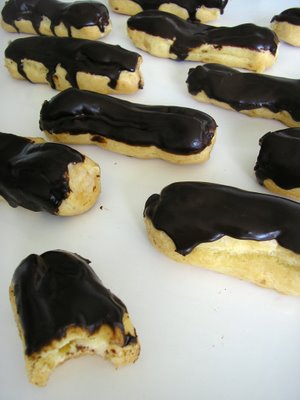
my own éclairs turned out beautifully and very delicious.
They are not quite yet in the same league as Fauchon’s, but this is truly a great recipe and it did give a real similar feeling as the one from last year…

I actually don’t really like custard or things filled with pastry cream - I’m not that keen on profiteroles or millefeuilles
but this cream filling - o my god
This pastry cream is different, slightly vanilla-infused and it is much lighter, as a result of adding whipped cream into the batter.
This is very nice, and will make it possible to devour 5 or 6 Éclairs easily without needing any pause…

It was a lot of work, definitely if you compare it with the time it took to gobble them down…, but all worth it.
And who knows…if things go as I want, maybe you can have one someday at JULIA instead of Fauchon… ;)


Chocolate Éclairs (makes 30)
Pâte à choux:

- 115g (1stick/½ cup) butter, cut into pieces
- 1 tsp sugar + ½ tsp salt
- 150g (1 ¼ cups) all-purpose flour
- 4 large eggs (plus 1 egg white, if needed - I didn’t need it)

Pastry cream:
- 500ml (2 cups) whole milk
- 100g (½ cup) sugar
- ½ vanilla bean, split lengthwise, seeds scraped (or 1 tsp vanilla extract)
- pinch of salt
- 4 egg yolks
- 75g (¼ cup) cornstarch 2 Tbsp butter, cut into small pieces

Chocolate glaze:
- 170g (6 ounces) bittersweet chocolate, finely chopped
- 565ml (2 ¼ cups) heavy cream
- 1 Tbsp honey

1. Begin with the pastry cream:
In a medium saucepan, combine milk, half of the sugar, vanilla and salt.
Cook over medium heat until mixture comes to a simmer.

In a medium bowl, whisk together the egg yolks, cornstarch, and remaining sugar. Whisking constantly, slowly pour 100ml (½ cup) of the hot-milk mixture into the egg-yolk mixture. Continue adding milk (100ml/½ cup at a time) until it has been incorporated.

Pour mixture back into the saucepan, and cook over medium-high heat, whisking constantly, until it thickens.
Transfer to the bowl of an electric mixture fitted with the paddle attachment. Add the butter, and beat on medium speed until the butter melts and the mixture cools, about 5 minutes.

Cover with plastic wrap, pressing it directly onto the surface of the pastry cream to prevent a skin forming. Refrigerate until chilled, about 2 hours (or up to 2 days!) just before using, beat on low speed until smooth.
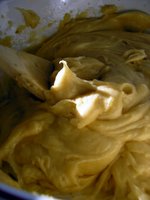
2. The pâte à choux:
Preheat oven to 210°C (425°F)
In a medium saucepan, combine butter, sugar, salt and 240ml (1 cup) water. Bring to a boil over medium-high heat, and immediately remove from heat. Using a wooden spoon, quickly stir in the flour until combined.
Return pan to medium-high heat, and cook, stirring constantly, until mixture pulls away from the sides, about 3 minutes.

Transfer mixture to the bowl of an electric mixer fitted with the paddle attachment. Mix on low speed until slightly cooled, about 1 minute.
Increase the speed to medium, and add the whole eggs, one at a time, beating until each is incorporated before adding the next. Test the batter by touching it with your finger and lifting to form a soft peak. If a soft peak does not form, the batter needs more egg. If you have added all the whole eggs and the batter still does not form a soft peak, lightly beat the remaining egg white, and add a little at a time.
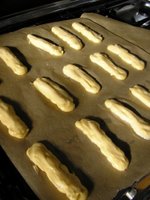
3. Making Éclairs out of the pâte à choux:
Line two large baking sheets with parchment paper. With a ruler and a pencil, mark lines about 8 cm (3 ½ inches) long on the parchment paper, spacing them about 5 cm (1 ½ inches) apart. I got 15 on my sheet.
Turn parchment paper over, marked sides down (otherwise your Éclairs will have little lines on their back…!)

Fill a pastry back with pâte à choux and pipe along the lines on the prepared baking sheets - about 1 cm (½ inch) thick. Gently smooth tops with a wet fingertip to ensure even rising.


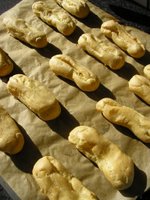
Bake for 10 minutes and reduce oven temperature to 180°C (350°F).
Continue to bake, rotating sheets halfway through, until pastries are golden brown, 25 to 30 minutes more. Transfer pastries and parchment paper to a wire wrack to cool completely.


4. Make the chocolate glaze:
Place chocolate in a heatproof bowl. (large enough that an Éclair could fit in lengthwise)
Heat 190ml (¾ cup) cream and the honey in a small saucepan over medium heat until bubbles begin to appear around the edges, about 5 minutes. Pour mixture over the chocolate. Let stand for 5 minutes, then stir until smooth. Let cool, stirring occasionally, about 5 minutes.

5. Filling the Éclairs:
With the same pastry tip (cleaned of course!) create a small hole on both sides of each shell.

Take the pastry cream out of the fridge and in a medium bowl, stir to soften.
In another bowl, whip the remaining 375ml (1 ½ cups) heavy cream to stiff peaks. Fold the whipped cream into the Pastry Cream in two batches to lighten.
Transfer to a pastry bag fitted with the same plain 1cm (½ inch) tip.
Insert the tip into the opening of each Éclair shell - both sides - and pipe to fill with the whipped pastry cream. You’ll feel when the Éclair is filled - you’ll feel pressure and the shell will be a lot heavier…

Dip the top of each Éclair into the chocolate glaze; let excess drip off, and place, coated sides up, on a wire rack set over a baking sheet.
Refrigerate Éclairs in a single layer in an airtight container until glaze is set, about 20 minutes or up to 2 days…


Tuesday, September 12

SHF23 Surprise Inside - Brownie Explosion...

Surprise!
I’m joining in the greatest Food Blogger’s sweet-tooth event: Sugar High Friday. This month’s theme is, big surprise!, Surprise Inside and is hosted by Alanna from A Veggie Venture.

I love my sweets but yet I had a hard time choosing what to enter.
What is the ultimate surprise?
Finding a broken nail from the hostess in your dessert is also a surprise, but not really the one I was hoping for…
But what then?
What’s the best base and what’s its best surprise?
The answer was actually rather simple: chocolate.
chocolate, chocolate and... chocolate!

I began a bit of experimenting and ended up making these dense and dark brownies. Very rich, pure, oozy and delicious. Instead of making one big one, I put them in individual little muffin-tins, and for the big surprise…
I buried cherry liqueur pralines inside them.

Can you really think of a nicer surprise than finding a soft kirsch centre, an explosion of flavour, inside the best brownie you’ve ever tasted?

The whole thing went quite well actually - I made the batter, placed the surprise-filling in the tins, covered them up and placed them in the oven… - but let’s just say it was a real surprise to find that after 20 minutes 12 little chocolate volcano’s had arisen in my oven, very angry and spewing out their lovely sugary-kirsch lava

OK, this was not really the surprise I was hoping for(!)

One tip, (in retrospect quite logic, but still…) make sure you completely cover up the bonbons - I used two different kinds of liqueur pralines (see photo above) and left the ones with those nice stems a bit uncovered…not my best move.
If you leave them uncovered, the alcohol will run out easily and vaporize when it’s chocolate layer melts…and they will turn out like this!

But luckily -surprise!- this didn’t ruin them at all (!)
they still looked very beautiful and they tasted absolutely amazing. Dark and dense, so rich and overwhelmingly chocolaty with still a delicious soft oozy kirsch centre…
Definitely worth a try!

I’ve added of course, - no surprise here - the recipe for you to try (and love)

Brownie Explosions (makes 16)

- 250g butter (2 sticks/1 cup)
- 250g best quality bittersweet chocolate (1,5 cup) chopped
- 4 eggs
- 325g (1 2/3 cup) fine granulated sugar
- 150g (1 ¼ cup) all-purpose flour
- pinch of salt
- 16 Cherry Liquor pralines.

1. Preheat the oven to 180° C (350° F) and grease and flour a muffin-tin

2. melt the butter and chocolate on low heat, stirring once in a while. In a large bowl, whisk together the eggs and sugar. Mix in a different bowl the flour and salt.

3. Take the chocolate mixture away from the heat when it’s completely melted, and let it cool off a bit before adding it to the eggs.

4. Add the chocolate mixture to the eggs and mix well. Add the flour and mix until you’ll have a smooth batter.

5. Place in every muffin tin a praline and cover them COMPLETELY with the batter. Fill every form. bake for 20 to 25 minutes, until done. The top will be dark and dry, but the centre still sweet, dense and compact. Be alert; the difference between a nice sticky brownie and a dried out one is just a couple of minutes!

6. Let them completely cool in their forms and keep in an airtight box.


Thursday, August 10

Chocolate truffles


The remaining ganache which was standing in my fridge since I’d made chocolate-glazed gingerbread cakes (see previous post) I ended up using for some chocolate truffles. I know, not the most original post. But because they’re so delicious you’ll all forgive me, right?
Chocolate truffles are extremely rich and tasty, very easy to make and so much fun! You will feel like a real chocolatier; shaping and creating your own legendary bonbons, and everything, really I mean everything, including yourself, will be covered with chocolate and cocoa powder…indeed one messy process! (Or does this happen just with me?)
But I’m sure you’ll completely forget this when you’re finished and you’ll have a delightful homemade truffle in return… =)

I made 3 different ones; one with a regular cocoa coating, one covered with a mixture from ground cinnamon and sugar, (this one was my favourite!) and the last one with a layer of ground hazelnuts -
They turned out beautiful and, of course, very tasty… (They’re ganache truffles; who doesn’t like that??)

After a bit of sampling, and my mom had another few more... - She really, really liked them; she just couldn’t leave them alone! - which made me of course in return happy; it’s nice if what you’ve made is been appreciated so much…-
Well, I packed “the leftovers” in nice, pretty, gift bags and gave them out as little presents. They looked wonderful and I must say, very impressive

Chocolate truffles

- 1 recipe for Chocolate Ganache (see previous post chocolate-glazed gingerbread cakes)
- 100 g bittersweet chocolate, chopped for coating
- +/- 50 g unsweetened cocoa powder
- +/- 50 g of chopped nuts – I used hazelnuts but just use what you like; almonds, peanuts or walnuts for example…
- 25 g cinnamon powder mixed with 25 g icing sugar


1. If you haven’t have the ganache already; make the ganache and let it stand for at least 2 hours, until firm. (or chill, covered, until firm)

2. Scoop, with a spoon, the truffle mixture into little balls (about 2 cm) and roll each one in your hand palms until round. Place them on a plate and chill the truffles thoroughly - the warmth of your hands will make them melt a little!

3. melt the chocolate in a heatproof bowl over a pan of simmering water (stir once in a while) and spread the cocoa powder on one plate, the cinnamon/icing sugar on a second plate and the chopped nuts on a third one.

4. When the chocolate is melted, take it off heat and let it cool slightly. take the truffles out the fridge.

5. Dip one hand in the melted chocolate. Pick up a truffle with your clean hand and place it in your hand covered in chocolate. Smear the truffle all with chocolate and then roll it through one of the coatings. Place on a plate and repeat this process for all the truffles. You’re done!

6. Truffles can be served immediately or can be refrigerated for up to 10 days.