Showing posts with label cookies. Show all posts

Thursday, December 28

Great Presents and Late Cookies

Happy 4th Christmas day! ;)
[Sigh] The presents are unwrapped, the family is gone, the Christmas tree has lost most of it’s special-ness, and you’re probably still full from all the loads of food.
Finally, everything is becoming calmer. Now starts a bit of that peacefulness. You survived the big stress and it’s now time to relax… How about some more cookies? Just kidding.

The true Christmas thought isn’t of course about presents or mountains of food, but it is a nice side issue.
It’s far from necessary, but it is a great opportunity to do something extra for your loved ones, pamper them (a bit) with treats you know they would appreciate.
And you can’t believe how incredibly spoiled I got…

Not bad, eh? Thank you Santa(s) for all the beautiful, thoughtful presents! ;)

But it’s clear that these amazing books come with another problem.
In gods name, what should I make first?? It’s already impossible to choose from Hermé’s, how should I ever pick something out of three??
Luckily my vacation isn’t over yet, and as I’m a bit sick and spend most of my time in bed now, I have all the time to read them from cover to cover and amaze myself about their geniusness…

Back to other sugar, back to the Christmas Sugar Cookies! Although Christmas is over and I do think these are really Christmas-y cookies, I wrote down the recipe here below. They are so sweet, buttery and easy that I wouldn’t mind having them, lets say, on a February morning.
And you can make them of course easily less Christmas-y by replacing the cherries for something like chocolate chips! They make a nice present, and they are perfect for making ahead, as you make the dough in advance.

The Plaisir Sucres, Macarons, Croissants, Tarte Tatin, and who knows what more, (unfortunately) have to wait a bit more because first…it’s (almost) time for making the best oliebollen!

=> Haha, mine are way better than these!! ;)

Will be continued...


Christmas Sugar Cookies (makes a hundred!)
(From BBC GoodFood)
- 300g (1 ½ cups) granulated sugar
- 140g (1 stick and 2 Tbsp/½ cup and 2 Tbsp) butter, softened
- 2 eggs
- 1 Tbsp pure vanilla extract
- 2 Tbsp milk
- 550g (4 cups) flour
- 2 tsp baking powder
- ½ tsp salt
- 200g (1 cup) glacé cherries, chopped. (bigarreau)

1. In a large bowl, beat the sugar and butter together until pale and creamy. Gradually beat in the eggs, vanilla and milk.
In a new bowl, mix the flour, baking powder and salt together. Then add a few spoonfuls at a time to the butter mixture, stirring with each addition to combine. Fold the cherries through the dough, and shape into to logs.
Wrap the logs in cling film, freeze one and chill the other for at least 2 hour.

2. Heat the oven to 180°C (350°F) and line three baking sheets with parchment paper. (of course if you don’t have three, bake in batches)
Take the chilled logs from the refrigerator, unwrap, let warm up slightly, and use a large knife to slice rounds the thickness of a coin.
Lay the cookies out on the trays and bake for about 5 minutes until golden brown. Repeat this process for the other log in the freezer.
Cool on a wire rack before serving. The cookies will keep in an airtight container for up to 3 days.

Optional: spread the logs with some egg yolk and roll them though the sugar! Extra sugar cookies!

Thursday, December 14

Almost

Sinterklaas has left the country, our (gigantic) tree is up, shining and smelling really nice, and I have finally time to spend some time behind the computer and post again.
It has been so busy lately…I’m glad it’s almost vacation - time for Christmas!
(who in the world can do math or French when you know you have to go to school for just one more week?!)

Did you know that Santa Claus is based on our Sinterklaas? Yes - they both refer to Saint Nicolas; a bishop who lived in the third century and became known for his generosity and love for children.
A big difference however, is that Sinterklaas still comes with a boat from Spain, and Santa Claus with a sledge from the North Pole. Sinterklaas comes along with his black ‘pieten’ and Santa Claus has elves…
Here in Holland you see around this time of year a sort of battle between Sinterklaas and Santa Claus, on who’s nicer/better…really strange when you know they are the same person!

Anyway, Saint Nicolas 1 is gone and it’s time for number 2! Christmas!
Time for a lovely, forest-y smelling house, twinkling lights, Christmas songs on the radio, snow (yeah right!), presents under the tree, and…making Christmas cookies!

Making Christmas cookies is such a relaxing, rewarding thing - and it will definitely bring you in the holiday spirit!
It’s easy, they smell amazing, you can make them in every kind of shape or flavour you want, and it’s really fun to decorate them in every possible way…

I made my basic recipe which is perfect and really hard to mess up, and when I was finished I added some of my favourite flavours.
I divided the dough into three, and kneaded into the first ball some salt and pepper, into the second ball some cinnamon and into the third ball some cacao powder…
They all turned out beautiful and perfectly crispy, but the cinnamon version was absolutely my favourite…delicious!

I made a sugar glaze and melted some chocolate, put on a Christmas cd and I got going with a whole load of decorations: candy pens, sprinkles, and lovely little silver, gold, and green sugar balls…
It was really calming (in these 3 hours I almost forgot all the schoolwork I still have to do…) and you will feel so proud and artistic if your cookie turns out good and pretty…
And the ugly, not so arty cookies? Ah…they’ll be quickly gone and forgotten… ;)

Christmas Cookies
- 300g (2 cups) all-purpose flour
- pinch of salt
- 2 tsp baking powder
- ½ tsp ground nutmeg, ½ tsp ground ginger, ½ tsp ground cinnamon
- 100g (½ cup, 1 stick) butter, softened and sliced
- 100g (2/3 cup) brown sugar
- 2 large eggs, beaten with
- 4 Tbsp liquid honey
glaze:
- 250g (2 cups) confectioner’s sugar
- 4 Tbsp boiling water
extra:
- 100g (1 bar) good quality chocolate
- sprinkles, candy pens, sugar balls, etc.

1. In a large bowl, mix together flour, salt, spices and baking powder. Add the butter and sugar, and mix with the electric mixer fitted with the paddle attachment, until crumbly. While the mixer is spinning, slowly add the egg/honey mixture. - Don’t pour in at once, otherwise there is a big chance you’re dough will be too sticky! - Pour in until you have a well blended, handable dough.
The dough is now ready. You can just use it like this (and go to step 2) or add some spices/flavours.
This is what I did:
Divide the dough into three and put the three balls into different, small bowls. Add to bowl 1 a good pinch of salt and 1 teaspoon of pepper. Knead this into the dough. Do this as well for bowl 2 and 3, adding 1 tablespoon of ground cinnamon, and 2 tablespoon of cacao powder.

2. Beat each ball down to a disc and wrap into plastic. Refrigerate for at least 15 minutes.

3. Preheat oven to 170°C (340°F) and line two baking sheets with parchment paper.
Flour your work surface, and take out the first disk of dough.
Roll out thinly, keep flouring (it can be a bit sticky) and cut out the cookies - or if you don’t have cookie cutters, just carve them out with a sharp knife. Transfer to the baking sheet and make a small hole in each cookie so you can hang them in the tree.
Knead the leftovers together, roll out again and cut out more cookies. Do this until you have no more dough left. Do this as well with the other two flavours.
You can also put a bit of chocolate and cinnamon dough together and make fusion cookies! (see the last picture)

4. Bake for about 10 minutes until the bottom is golden brown. But keep checking them during the baking! Let cool completely and make the glaze, or store in an airtight container.

Glaze:
1. Mix the confection’s sugar with the boiling water, adding each spoon of water after the previous one is well blended, until you have a silky, thick glaze.

Melt the chocolate, while stirring, in an heatproof bowl.
Get out a few clean spoons, kitchen paper and the decorations…and get creative! ;)


Saturday, November 25

1 + 1 = 3

Sometimes is 1+1=3
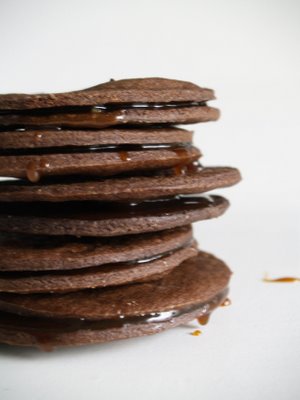
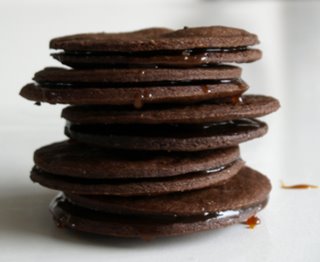
These Chocolade Stroopkoeken (chocolate treacle cookies) are a classic example for this. They are not just two crispy chocolaty cookies fused together with some hot, creamy, salted treacle….but they are the best crispy chocolaty cookies fused together with some hot, creamy, salted treacle. They are amazing.
Make a hundred and you still want more, I guarantee.

The stroopkoek is a typically Dutch product. Only, undeserved, a whole lot less known then it’s brother the stroopwaffle. Although I can appreciate a hot, freshly made stroopwaffle from time to time, (especially with this colder weather) I prefer a stroopkoek. And then of course the version as shown here above: thinner, chocolaty and salted. Heaven.

I got them from Koekje, the cookie-bible I wrote about before. The recipe comes from Kees Raat (kind of logical since it’s a(n incredible) twist on the normal stroopkoek…) but I adjusted it slightly since I didn’t have pepper vinegar or zeeuwse flour (from Zeeland - a part of Holland) and because - let’s face it - I like it always just a bit more salty and chocolaty.

Two thin chocolate biscuits with the best salty caramel-y syrup which will make the cookies deliciously chewy and sticky. What do you want more? Enjoy immediately while the treacle is still hot. Try them and love them…;)


Chocolade Stroopkoeken
- 120g (1 stick/½ cup) butter, softened
- 60g (1/3 cup) dark brown sugar
- 60g (1/3 cup) white brown sugar (witte basterdsuiker)
- pinch of salt and pepper
- 1 tsp vinegar
- 1 egg, lightly beaten
- 200g (1 ½ cup) flour
- 4 big Tbsp cacao powder
- 1 big tsp baking powder
For the syrup:
- 100g (½ cup) stroop (treacle)
- 60g (1/3 cup) white brown sugar
- 60g (½ stick, ¼ cup) butter, softened
- 1 Tbsp sea salt

1. In a medium bowl, sift together flower, cocoa powder, baking powder, salt and pepper. Set aside. In a large bowl, mix butter, the two sugars, vinegar and egg. Add the flower mixture to the sugar mixture and knead it to a ball. Pack in foil and let rest in the fridge for at least one hour.

2. Preheat oven to 170°C (340°F) and line 2 baking sheets with parchment paper.

3. Get the dough out of the fridge and roll out thinly on a lightly flowered surface. (if it’s too sticky, use some more flower) you can best do this in 3 or 4 times as the dough will break easily.
With a round 10cm (4inches) form, - or a cute small one…- stick out cookies and line them on the baking sheets. Bake for about 10 minutes, until set and down. Let cool completely and make the syrup.

Syrup:
1. In a small saucepan over medium heat, melt treacle with sugar, butter and salt. Stir until well blended and let cool a bit.

2. Ladle syrup on the flat side of a cookies, move it a bit back and forth to even and close with a second cookie. Repeat with remaining cookies.
Enjoy immediately or keep in an airtight container for up to 3 days.

Wednesday, November 22

Going Dutch: Koekje

In Holland there are just a few really good, legendary, patissiers.
Two of them are Cees Holtkamp and Kees Raat.
They are both really different and yet the same;
Cees Holtkamp started in Amsterdam in 1969 and is famous for his simple, straightforward and traditional approach to baking.
Kees Raat opened his ‘Unlimited Delicious’ in Amsterdam 15 years ago and became known for his originality and uniqueness.
These two masters are now combined in one beautiful little book: Koekje. (Cookie)

I can’t believe Koekje wasn’t here earlier - it’s indispensable.
The concept is brilliant; Holtkamp wrote down his (50!) recipes for all the classic Dutch cookies, - such as stroopwafels, Arnhemse Meisjes, Goudse Moppen and Jan Hagel… - and Kees Raat gave each cookie his own, creative twist and came up with 50 brand new cookies as Chocolate Blini’s, Javaanse Jongens and Zeeschuim (!)


Koekje is a clear-cut, beautiful book with on every single page a picture.
I love that I now finally have a book where all the recipes for good Dutch cookies are bound together.
And I’ve discovered so many new, which are in fact old, recipes(!)
Who still knows how a Haarlems Halletje or Nonnenscheetje taste?
And Haagsche Wind??
Haagsche Wind (Wind of the Hague) dates all the way back to 1880. Living in The Hague and never having tried it - how could I not make it?

(Plus it was a wonderful opportunity to use my new pastry bag from la Bovida that I still hadn’t used since my trip to Paris…!)

Haagsche Wind is a sweet little meringue cookie with cute looking almonds on top. It’s one lovely cloudy bite: crunchy on the outside and soft and airy inside.
Meringues are well loved in my family.
I once tried to make meringues, but it didn’t work out so well - this recipe however, is a keeper.

99 recipes left in ‘Koekje’…what will I make next?


Haagsche Wind
- 3 egg whites
- 150g (¾ cup) finely granulated sugar
- 100g (½ cup) confectioner’s sugar, sifted
- 100g (1 cup) almonds, lightly roasted and roughly chopped

1. Preheat oven to 120° C (248° F) and line one baking sheet with parchment paper.

2. Beat, with an electric mixer, egg whites until frothy. Gradually add granulated sugar and mix until well blended. Beat in the confectioner’s sugar carefully until the mixture is white and glossy.

3. Fill pastry bag (with a 2cm, 1 inch tip) with the mixture and drop little dots on the prepared baking sheet. Sprinkle with the roasted almonds and bake for 20 minutes until set. Let cool completely before enjoying and store in an airtight container.


Holtkamp
Vijzelgracht 15
1017 HM Amsterdam

Unlimited Delicious
Haarlemmerstraat 122
1013 EX Amsterdam

Tuesday, November 14

Nuts...

My new camera is driving me nuts.
It’s so pretty and I really love it but I’m beginning to get a little desperate.
It doesn’t matter what I do - all my pictures are either too light or too dark and too blurry or too dim. I really hope it’s just a temporary problem and I just haven’t figured out the light focus or something like that…

So under the impression that at least one of my 158 photo’s was good, and without further checking, I started tasting and…
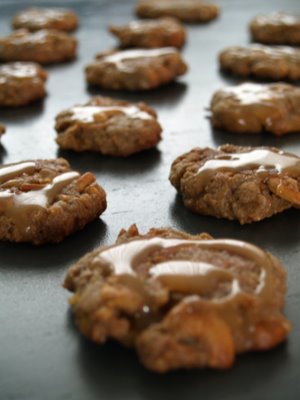
all the cashew-caramel cookies disappeared quickly.
And this was the best picture in the bunch.
I’m sorry I can’t let you better see how incredibly delicious these cookies were…

Because they weren’t just good.
They were really, really good.
I know it’s a bit strange, but you make me most of the time happier with a good spoon of cookie dough then the cookie itself…
Well, these nut cookies are like the best cookie dough ever.
They are chewy, not too sweet, and the cashews are lovely caramelized in the oven. They have a good bite, a delicious sugary bottom and an amazing soft caramel swirl on top…oftewel; echte door-etertjes! (so it’s really hard to stop eating these…!)

I found the recipe online at MarthaStewart.com but I made some big changes in the process so I typed out what I’ve done here below.
If you want to check out the original recipe; click here

I don’t have a decent electric mixer to grind cashews with, only a puree mixer with a sharp blade which will make the nuts fly and spring everywhere (I have btw a rather horrific Christmas story about this blade - but that maybe for later…) so I just chopped 1 cup finely and kept the rest in big chunks. This worked out really well as I may say so.
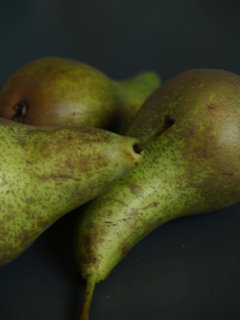
For some reason I wanted to add pear as well. Don’t ask me why, I just had a feeling. It turned out to be a wrong feeling; there was absolutely no trace of pear in these cookies. Not that's incredibly terrible, I think they are pretty perfect just like this…
I kept the pear in the recipe what so ever - who knows how they would turn out without it??


Cashew Cookies (makes 24)
- 200g (1 ¾ cups) all-purpose flour
- ½ tsp salt
- 350g (3 cups) roasted, salted cashews
- 4 Tbsp sunflower oil
- 115g (1 stick, ½ cup) butter, softened
- 115g (¾ cup) packed light-brown sugar
- 100g (1/2 cup) granulated sugar
- 1 egg
- 1 tsp pure vanilla extract
- 1 pear
- 24 cubes soft caramel candy (200g, 7 ounces)
- 65ml (1/4 cup) heavy cream

1. Preheat oven to 180°C. (350°F)
Mix flour and salt together in a small bowl and set aside. Finely chop 1 cup cashews and transfer them to the bowl of an electric mixer fitted with the paddle attachment. Add butter and sugars and mix on medium speed until fluffy. (about 2 minutes)
Mix in egg, vanilla and oil. Reduce speed to low and gradually add flour mixture. Wash and dry the pear and thinly slice it with a cheese-slicer. Chop these slices into even smaller bits and mix it in with the reserved, roughly chopped cashews.

2. Shape dough into 4cm (1 1/2-inch) balls; space 5cm (2 inches) apart on 2 parchment-lined baking sheets. Bake 6 minutes and gently flatten with a spatula. Bake until bottoms are just golden, 6 to 7 minutes more. Let cool completely.

3. For the caramel, melt caramels with cream in a small saucepan over low heat, stirring. Let cool. Using a spoon, drizzle caramel over cookies and let set. Store the cookies in an airtight box in single layers.

Tuesday, October 17

Autumn Weather…Time for Cookies

Summer is definitely over. And it happened so quickly;
The streets are rainy and the trees transformed from green to all shades of yellow, orange and red. It’s still dark outside when I wake up in the morning, I need a scarf on when I go to school and I hate that the wind has become so cold and raw…
The plus side however, is that it’s time for candles, tea, electric blankets and wearing comfy ski socks again(!) (and almost time for oliebollen!)

In the summer nothing beats a fresh, sour apple, but with this weather I prefer baking; the wonderful perfumes filling the house, the apples becoming all soft and oozy in the oven, their hotness and perfectly sweetness…

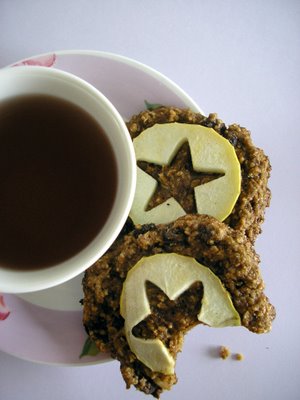
These Apple Cookies are great and have al the above.
They are granola-y and hearty, with delicious crispy edges and a soft apple-ish inside.
I start with the edges, slowly nibble them off, work my way in, and finish with one soft and gooey last bite…
These cookies are robust, sweet and spicy, and really substantial - great for those chilly days…


Apple Cookies (makes about 30)
- 240ml (1 cup) apple juice
- 200g (1 cup) currants
- (250) 2 cups whole-wheat flour
- 1 tsp baking soda
- 1 tsp ground cinnamon
- 1 tsp ground nutmeg
- 1/2 tsp salt
- 225g (1 cup/2 sticks) unsalted butter, room temperature
- 300g (2 cups) dark-brown sugar, firmly packed
- 1 egg, room temperature
- 250g (2 1/2 cups) rolled oats
- 5 crisp and tart apples, I used granny smith
Granulated sugar, for sprinkling (optional)

1. Heat the oven to 180°C (350°F) and line a baking sheet with parchment paper.
Heat cider in a small saucepan to a simmer. Place currants in a bowl and pour the warm cider over them. Let plump at least for 10 minutes.

2. Mix in a small bowl together flour, baking soda, cinnamon, cloves, nutmeg, and salt. Set aside.

3. In the bowl of an electric mixer fitted with the paddle attachment, cream together butter and brown sugar until fluffy. Add egg, and continue beating until well blended.

4. Add the dry ingredients, beating until just combined. Add the currants with half of the cider and oats until just combined. Using the largest holes on a box grater, shred 2 apples directly into the dough, rotating to avoid seeds and core. Stir well to combine.

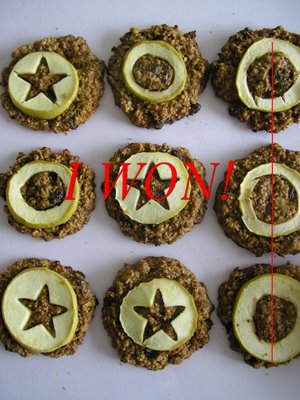
5. Using two spoons, scoop out cookies and place on the prepared baking sheets about 2 inches apart. Using a sharp knife, slice 2 or 3 apples very thinly. Remove core with a cookie cutter or with a knife (you can make all sorts of fun figures…) Place a thinly sliced apple ring on top of each cookie and sprinkle with a pinch of sugar, if desired. Bake in the heated oven until dark brown, 18 to 20 minutes. Repeat with the remaining batter. Let cool completely before storing in an airtight container. Can be stored for 3 days - but be warned, they will soften and soften and...

Monday, September 18

Prinsjesdag & Royal Cookies

Every third Tuesday of September - as tomorrow - is Prinsjesdag.
Prinsjesdag, literally translated day of the princes, is the official opening of the Dutch parliamentary year. On this day the Queen rides in her Gouden Koets (Golden Coach) all the way through The Hague. She begins her route at the Noordeinde Palace and ends at the Dutch Parliament on het Binnenhof.

Here, in de Ridderzaal, she reads her annual speech in which she introduces the plans of the government, together with the national budget for the Netherlands for the new year.
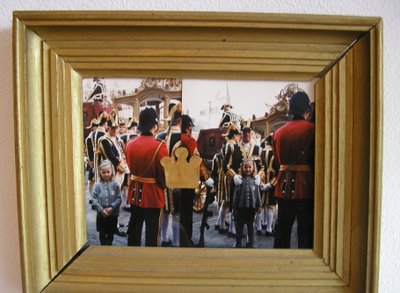
The name ‘Golden Coach’ is in fact a bit misleading, since the wood is only partially gilded; the rest of it is painted. The carriage is decorated with symbolic motifs and is drawn by eight horses...

Prinsjesdag is a real festive day here in Holland; flags are hanged out and the whole city is orange. (the Royal name is Van Oranje-Nassau… oranje means orange!)
There is carnival, thousands of tourists come to The Hague and…we get a day off from school!
We can go watch the parade, look at the carriage, wave at the queen and - what I especially enjoy - go check out what kind of outfits with big ridiculous matching hats the royals picked out to wear this year! Maybe feathers this year? A pyramid, some vegetables, or simply some fruit?

Because my mother works in the second chamber, (part of the parliament) I grew up very close to all this and is it very fun to walk nonchalant by the tourists, past the security and go inside…!

The year I was 8 (a time where there weren’t terrorist alarms yet) my mum even found a short cut to Het Binnenhof and I could sneak all the way to the front and stand right next to the Golden Coach…=)
I’m not at all pro-royal, but yet I enjoy this day always very much.
Prinsjesdag seemed a good motive (and excuse!) for me to bake something orange, royal and of course, sweet!

I made these royal cookies with orange and ginger.
I adapted them from the classic gingerbreadmans -
added orange zest and orange juice, shaped them into little crowns and decorated them with a simple sugar glaze and orange muisjes.

These cookies are delicious, smell incredible and have a slightly orange hint. They are thin and crispy, a bit buttery and full of flavour. Although the glaze and decorating does give an extra touch, and is fun to do!, they are also delicious just plain.


Royal Orange Ginger Cookies (makes about 2 dozen)
- 420g (3 ½ cup) all-purpose flour, plus more for dusting
- 1 ½ tsp baking soda
- ¼ tsp salt
- 1 ½ tsp ground cinnamon
- 1 ½ tsp ground ginger
- 1 tsp ground allspice
- 225g (2 sticks/1 cup) butter, room temperature
- 150g (¾ cup) granulated sugar
- 135 g (¾ cup) packed dark-brown sugar
- 2 tsp orange zest
- 1 egg
- 70g (¼ cup) unsulfured molasses
icing:
- 200g (1 cup) icing sugar
- 1to 2 Tbsp orange juice and 1 Tbsp orange zest

1. In a large bowl, whisk together flour, baking soda, salt, cinnamon, ground ginger, allspice. Set aside.

2. In the bowl of an electric mixer fitted with the paddle attachment, beat butter, both sugars and orange zest on medium speed until light and fluffy, 2 to 3 minutes. Beat in egg and molasses to combine. With mixer on low speed, slowly add the flour mixture, beating until just incorporated.

3. Turn out the dough onto a clean work surface. Divide in half, shape into flattened disks and wrap each in plastic. Refrigerate at least one hour or overnight.

4. Preheat oven to 180°C (350°F) and line to baking sheets with parchment paper. Set aside.
Remove dough from the refrigerator, and let stand until slightly soften. (this will help keep the dough from cracking when rolled.)
On a large piece of parchment paper lightly dusted with flour, roll the dough thinly out. Place the dough and parchment paper on another baking sheet (or a tray) and freeze until very firm, about 15 minutes.

5. Remove dough from freezer, working quickly, cut out large cookies with cookie cutters or your self invented ones with a knife. Using a wide metal spatula (or a cake-slice) transfer cut-outs to prepared baking sheets and bake, rotating sheets halfway through, for 12 to 15 minutes, until crisp but not darkened. - they will harden more when they cool! -
Transfer cookies and parchment paper to a wire rack to cool completely. Decorate if you want.
Cookies can be kept in an airtight container at room temperature for up to 5 days.

Icing:

sift the icing sugar above a bowl and pour in enough orange juice to get a very thick glace. Add the orange zest and mix well. It is better to get a glace that is too thick than a soft, runny one! Spoon the glace onto the cookies and wait a minute or so till it's completely hard.

Wednesday, September 13

Triple Love Biscotti

I’ve told you before about my undying love for kruidnoten.
So when I saw they - very logic since it’s half September… - had entered the shops, you maybe understand my first impulse was to buy the entire pile, rip open every bag and build my own kruidnoten-house where I could happily live in.
But I as well became a bit confused about it.
What was going on here? This isn’t normal! Do they think we don’t have a calendar - it’s 3 months till December! It’s just absurd!
Therefore I decided to go on strike and will refuse to participate in this ridiculous nonsense. I will be strong and will turn every kruidnoot down till half November!

Uhm…
Ok.
It's true.
I did buy one bag.
But I can explain it one hundred percent -
I had to buy it.
I needed them for the following Triple Love Biscotti…so it doesn’t count and I’m still strong and still on strike (!)

Now is the first love in ‘triple love biscotti’ explained.
The second and third love will be also clear when I tell you they contain chocolate and coffee.
They contain chocolate coffee. ;)

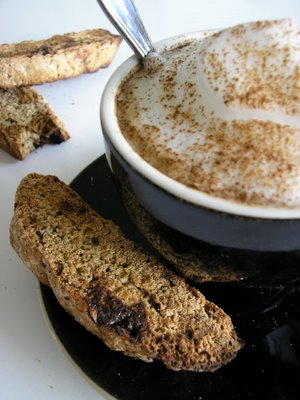
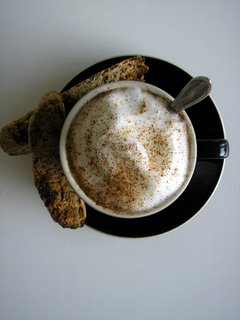
This combination of flavours and spices is just absolutely heaven and perfect with a nice cup of coffee…

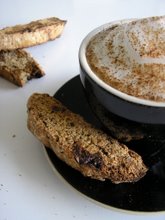
This biscotti (cantucci) is flavourful and exactly crunchy enough. It has a perfect subtle hint of coffee and the delicious big chunks of chocolate and kruidnoojes will melt a bit when you dunk it in your coffee…
I used my favourite biscotti recipe, which originally has hazelnuts (another love) instead of kruidnoten - also very, very good…

Triple Love Biscotti (makes bout 20)
- 280g (2 cups) all-purpose flour
- 150g (¾ cup) granulated sugar
- 1 tsp baking powder
- pinch of salt
- 1 tsp cinnamon powder
- 2 tsp instant espresso powder
- 3 eggs
- 1 tsp pure vanilla extract
- 100g (1cup) kruidnoten, roughly chopped
- 85g (½ cup) bittersweet chocolate, roughly chopped

1. Preheat oven to 150° C (300° F) and line a baking sheet with parchment paper

2. In a small bowl, whisk together eggs and vanilla extract. Mix in a large bowl flour, sugar, baking powder, salt, cinnamon and espresso powder. Add the egg mixture and beat until a dough forms, kneading with the back of your spoon and adding the chocolate and kruidnoten about halfway through.

3. Form a dough ball and divide it in two. Roll each half, on a lightly floured surface, out into a log - 20 cm long and 7 cm wide. Transfer them onto the prepared baking sheets and bake for 40 minutes, or until firm to touch.

4. Remove from oven and let cool for about 10 minutes

5. On a cutting board, using a sharp knife, cut slantwise both logs in slices, 1 to 2 cm tick

6. Arrange the slices on the baking sheet and bake for 10 minutes. remove them from the oven and turn slices over, bake again for another 10 minutes, until nice, firm and golden-brown on both sides.

7. Remove from oven and let cool. Store in an airtight container.


Wednesday, September 6

Kletskoppen

Some days I just crave for sweet. Often something in particular and once I’ve figured out what exactly, I just want to get a move on and make it as soon as I can. (or simply buy it of course…)
Well, last weekend I had this distinct urge for kletskoppen. Kletskoppen are caramelized peanut biscuits and beloved old-Dutch cookies.
Although you can buy them in every supermarket and almost every bakery sells them fresh, I decided to make them myself. I found many, many recipes on the net, all quite similar, so I just merged a few different ones, added to taste some more peanuts and finally ended up with this.

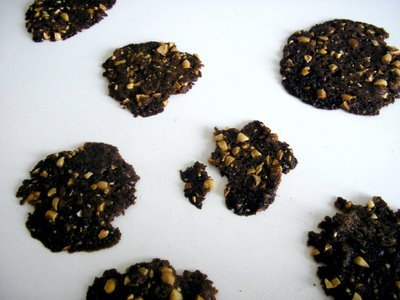
Figurative is a kletskop in Dutch someone who talks a lot and superficial, but this biscuit got its peculiar name - literally translated means it smack head - as a result of the preparation; when you put the dough on the baking sheets, you have to klets (smack) the tops with the back of a spoon and make them as thin as you can. This way you will get a lovely crispy cookie.

A kletskop is made of almost only sugar and will melt in the oven to a delicious crispy biscuit with little holes in it. They are sweet and crunchy, great to nibble on or served with dessert. ice cream for example.

Kletskoppen (makes 20 if you don’t snack to much of the dough…)

- 50 g peanuts, finely chopped
- 125 g brown castor sugar
- 1 tsp ground cinnamon
- pinch of salt
- 55 g butter, melted
- 50 g all-purpose flour

1. Preheat the oven to 200 ° C and line two large baking sheets with parchment paper.

2. Mix in a standard mixing bowl castor sugar, cinnamon powder and salt. Add the melted butter and mix until well blended. Add in parts the flour and chopped peanuts and mix until you’ll have a compact dough.

3. Shape little balls, about a tablespoon full, and place them with 10 cm space between them on the baking sheets. Smack them with the back of a spoon out as thinly as you can. Bake for 5 to 7 minutes until melted, paper-thin and golden brown. Leave them to cool and harden on the baking sheets and keep in an airtight box.

Thursday, August 31

Salty Triangle Biscuits

Because this following recipe should really come with a warning, thoughtful as always, I added it in for you...
warning:
It is very likely once you’ve tasted one of these totally luscious crisps, and you’ve got the rich addictive flavour remaining in your mouth, many, I really mean many, will follow and you will find yourself devouring the entire pile.
So a great self-control is needed.
Because I apparently don’t have that, an entire pile did follow and now we refer to them simply as ‘de lekkere ziekmakertjes’ - translated ‘the delicious little sickmakers’

I found the original recipe for these salty biscuits in Martha Stewart’s Baking Handbook.
I don’t know what it is but I always pick out recipes that are paired with a nice picture. The art of good photography really gets me and makes me unconsciously craving for all their tasty looking delicacies. I simply can’t get a recipe out off my mind after I’ve seen the beautiful, flawless, tempting photograph.
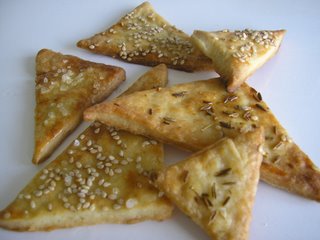
So after seeing Martha Stewart’s mouth-watering photograph of these lovely golden-brown cookies, there was no question. I just had to make them.

Martha titled them ‘Savoury Caraway Cheese Crisps’ but you can’t really taste the mascarpone and the caraway seeds weren’t such a success so I thought they would be better of as ‘salty triangle biscuits’ and I changed it.

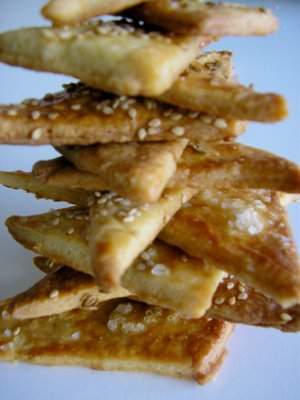
These cookies are surprisingly rich and light at the same time. Flaky, with a subtle, soft flavour and very irresistible. They are dry, o so buttery and they will become deliciously soft and oozy on your tongue while chewing.
Perfect for an afternoon snack or appetizer, they were also much enjoyed the next evening with a light salad.

Salty Triangle Biscuits
(makes about 5 dozen)
- 400 g (2 ¾ cup) sifted all-purpose flour, plus more for dusting
- ½ tsp baking soda
- ½ tsp salt
- 55 g (¼ cup) sugar
- 200 g (2 sticks/1 cup) unsalted butter, at room temperature, cut into pieces
- 250 g (8 ounces) mascarpone cheese
- 1 large egg
sprinkling:
- coarse sea salt
- sesame seeds
- optional: your favourite herbs/spices

1. In the bowl of an electric mixer fitted with the paddle attachment, mix the flour, baking soda, salt and sugar. Add the butter, one piece at a time, beating until the mixture resembles coarse meal.

2. Add the mascarpone and beat until a soft dough forms, scraping down the sides of the bowl as needed.

3. Turn out the dough onto a clean surface and divide it in half. Shape each into a flattened square, wrap in plastic and refrigerate at least one hour or overnight.

4. Preheat the oven to 175°C (350°F) Line two large baking sheets with parchment paper and set aside.

5. Take the dough out of the fridge and roll each piece thinly out into a big square on a well-floured work surface. Using a pizza wheel or sharp knife, cut the dough square into triangles. (They should be roughly the same size, but the shapes don’t have to be uniform) Place them on the prepared baking sheets.

6. In a small bowl, whisk together the egg and 1 tablespoon water. Brush each triangle with egg wash. Sprinkle some with sea salt and the others with sesame seeds.

7. Bake for 15 to 18 minutes, until the crisps are golden brown. Transfer to a wire rack to cool completely. Crisps can be kept in an airtight container at room temperature for up to 3 days.

Thursday, July 27

Soft Blueberry Cookies with Chocolate Chunks

It’s soo hot at the moment in Holland. After a severe spring full with rain and storm, the sun finally found us and is making us regret for whishing for a hot summer with a terrible heat wave. Everyone is smelly & cranky and everything is melting. Although it’s not nice at the moment, I do love the summer.
The warmth, all the green outside, the fact that I don’t have to go to school and the most delicious kinds of fruit in the supermarkets.
Strawberries, raspberries, blackberries, blueberries… all beautiful lined up in the cooling area, waiting to be bought.

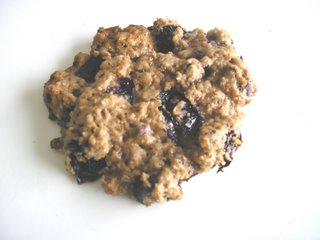
Perfect for making these delicious sweet cookies. They are really easy to make (which is extra nice with this wheater…) and are very light. The combination of the slightly bitter chocolate chunks with the sweet summer fruit is just heavenly. I love that the cookies’ll stay soft and moist, all oozie from the melted chocolate and berries. With a cup of tea, this is just the perfect way to start a hot summer day.


Soft summer Cookies with Blueberries and Chocolate chunks
(Makes about 10 cookies)

- 50 g butter - cut into small cubes
- 150 g wheatflour (so much better than just normal flour!)
- 1 ½ tsp baking powder
- 1 tsp cinnamon powder
- 70 g cane sugar
- 100 g fresh blueberries (can be replaced for other summerfruit)
- 75 g extra dark chocolate – chopped into little chunks
- 100 ml milk

1. Preheat the oven to 200˚C and line a baking sheet with parchment paper

2. In a medium bowl mix together the flour, baking powder and cinnamon. Knead the butter through the flour with your fingertips until it looks like rough breadcrumbs.

3. Mix in the sugar, blueberries and chopped chocolate. Stir in the milk until you’ll have a sticky dough.

4. Scoop the dough in little piles onto the bakingsheet, a bit flatten out and with about 5cm space between them.

5. Bake for 20 minutes, until they are goldenbrown and the tops feel dry and firm. Don’t overbake them, or they won’t remain soft and moist.

6. Let cool about 5 minutes before transferring from the baking sheet to a cooling rack. (they’ll break easily!) Enjoy and Store the rest in an airtight container.