Thursday, August 31

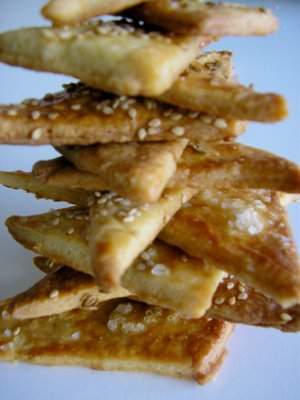
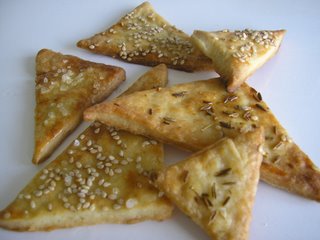
Salty Triangle Biscuits

Because this following recipe should really come with a warning, thoughtful as always, I added it in for you...
warning:
It is very likely once you’ve tasted one of these totally luscious crisps, and you’ve got the rich addictive flavour remaining in your mouth, many, I really mean many, will follow and you will find yourself devouring the entire pile.
So a great self-control is needed.
Because I apparently don’t have that, an entire pile did follow and now we refer to them simply as ‘de lekkere ziekmakertjes’ - translated ‘the delicious little sickmakers’

I found the original recipe for these salty biscuits in Martha Stewart’s Baking Handbook.
I don’t know what it is but I always pick out recipes that are paired with a nice picture. The art of good photography really gets me and makes me unconsciously craving for all their tasty looking delicacies. I simply can’t get a recipe out off my mind after I’ve seen the beautiful, flawless, tempting photograph.
So after seeing Martha Stewart’s mouth-watering photograph of these lovely golden-brown cookies, there was no question. I just had to make them.

Martha titled them ‘Savoury Caraway Cheese Crisps’ but you can’t really taste the mascarpone and the caraway seeds weren’t such a success so I thought they would be better of as ‘salty triangle biscuits’ and I changed it.

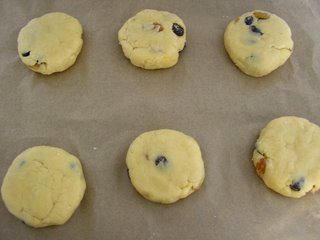
These cookies are surprisingly rich and light at the same time. Flaky, with a subtle, soft flavour and very irresistible. They are dry, o so buttery and they will become deliciously soft and oozy on your tongue while chewing.
Perfect for an afternoon snack or appetizer, they were also much enjoyed the next evening with a light salad.

Salty Triangle Biscuits
(makes about 5 dozen)
- 400 g (2 ¾ cup) sifted all-purpose flour, plus more for dusting
- ½ tsp baking soda
- ½ tsp salt
- 55 g (¼ cup) sugar
- 200 g (2 sticks/1 cup) unsalted butter, at room temperature, cut into pieces
- 250 g (8 ounces) mascarpone cheese
- 1 large egg
sprinkling:
- coarse sea salt
- sesame seeds
- optional: your favourite herbs/spices

1. In the bowl of an electric mixer fitted with the paddle attachment, mix the flour, baking soda, salt and sugar. Add the butter, one piece at a time, beating until the mixture resembles coarse meal.

2. Add the mascarpone and beat until a soft dough forms, scraping down the sides of the bowl as needed.

3. Turn out the dough onto a clean surface and divide it in half. Shape each into a flattened square, wrap in plastic and refrigerate at least one hour or overnight.

4. Preheat the oven to 175°C (350°F) Line two large baking sheets with parchment paper and set aside.

5. Take the dough out of the fridge and roll each piece thinly out into a big square on a well-floured work surface. Using a pizza wheel or sharp knife, cut the dough square into triangles. (They should be roughly the same size, but the shapes don’t have to be uniform) Place them on the prepared baking sheets.

6. In a small bowl, whisk together the egg and 1 tablespoon water. Brush each triangle with egg wash. Sprinkle some with sea salt and the others with sesame seeds.

7. Bake for 15 to 18 minutes, until the crisps are golden brown. Transfer to a wire rack to cool completely. Crisps can be kept in an airtight container at room temperature for up to 3 days.
Tuesday, August 29

I present...

Without much further a due, I now present to you
my brand new, stunning little baby, the most valuable possession I have…

My beautiful new Dell Inspiron 1300 Notebook (!)


It feels a bit strange to sit here, by the way very comfortable, on the coach typing up this short post. This is such a luxury after the many hours I spend on the (a lot less comfortable) wooden chair behind my desk. I’m still a bit taken aback from this, for me, very expensive purchase - I’m at once completely broke…- but I'm above all just really, really happy. I LOVE it!

I’m just going to play a bit with it right now, figure some handy things out and learn a few things about it. This might take some time because I’m not, how shall I put it, a real computer expert… - maybe you’ve noticed my attempt to put categories on my blog, which are STILL un-linkable…if anyone knows how to solve this problem by the way, don’t be shy and please share your secret! - =)

So from now on, only posts from this little wire-less beauty… =)

------------------

Monday, August 28

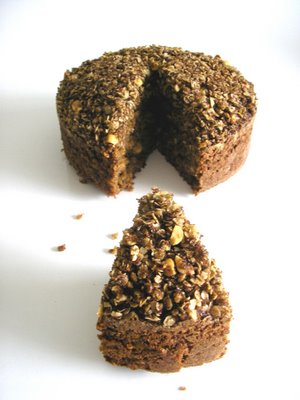
Banana Oatmeal Cake with Hazelnuts and Crumb Topping


A Banana Oatmeal Cake with Hazelnuts and Crumb Topping.
Wow, that’s a whole mouth full to pronounce. (try to say it, for fun of course, 10 times fast in a row…banana oatmeal cake with hazelnuts and crumb topping, banana oatcake with crumb hazelnutsmeal topping, hazelnuts and crumb oatmeal with banana cake topping, or something like that…)
I’ve noticed this isn’t the most mysterious puzzling title, but it is clear-cut and straightforward and I feel strongly that all the above elements should be pointed out and get their well deserved credits…=)
So here you have it; Banana Oatmeal Cake with Hazelnuts and Crumb Topping.

And a hit it was; it turned out to be a luscious cake with an overwhelmingly rich banana flavour. Healthy, light, slightly moist, sweet and with a nice extra bite due to the un-chopped hazelnuts.
Without the coating it would be actually a rather simple basic cake, but this baked on crispy, very sugary crumb topping gave it a very nice extra touch and made it stunning to see.

I loved the difference between these textures; dense and fluffy cake, covered with a delicious sweet crunchy layer… I made this cake because my grandma came to visit us and it was very well received. I served it with a nice cup of tea in the afternoon and it was perfect.


Banana Oatmeal Cake with Crumb Topping

- 85 g (1/2 cup) butter, softened
- 165 g (2/3 cup) packed brown castor sugar
- 2 eggs
- 3 large banana’s, mashed
- 110 g (3/4 cup) all-purpose flour
- 50 g (a good handful) hazelnuts
- 130 g (1 1/3 cup) rolled oats
- 1 tsp vanilla extract
- ¼ tsp salt
- 1 tsp baking soda
- ½ tsp baking powder
topping:
- 70 g (3/4 cup) rolled oats
- 80 g (1/3 cup) packed brown castor sugar
- 2 Tbsp (30 g) butter, melted
- 2 Tbsp (20 g) chopped hazelnuts
- ½ tsp ground cinnamon

1. Preheat the oven to 175˚C (350 F) and grease and flour a 24 cm (8 inch) spring form cake pan.

2. Stir together flour, oats (130 g), hazelnuts, salt, baking soda and baking powder.

3. Cream with an electric mixer the butter and brown sugar in a large bowl. Beat in the eggs, following the bananas and vanilla. Add the flour mixture to the banana mixture and mix well. Pour the batter into the prepared pan.

4. For the topping mix the oats, sugar, hazelnuts, cinnamon and melted butter together until crumbly.

5. Divide the topping onto the cake, and bake for 45 to 50 minutes, until it tests done. Transfer to a rack to cool.

6. Will keep for up to 3 days at room temperature, airtight wrapped in plastic. Can be frozen double-wrapped for up to a month.

Wednesday, August 23

Five things to eat before you die...

Perhaps you have already heard about this great meme which is going round invented by Melissa from The Traveler’s Lunchbox, the “Things to Eat before You Die” also known as “The Foodblogger’s Guide to the Globe”.
For this exciting project she asks follow bloggers worldwide, to make a list of their five most amazing, most special, tastiest food experience that they think everyone should once try in their lives. Very happy and honored to be tagged by Aun a.k.a. Chubby Hubby, I’ll now present you MY list of Thing You Must have Eaten At Least Once Before You Die…


1. Ganache truffles
Nothing beats a ganache truffle. I’ve been privileged to have sampled many bonbons and other delicious chocolate creations, from Wittamer to Fauchon, and although these are very outstanding and magnifique, I simply can’t live without ganache truffles. Only a ganache truffle has that ultimately richness and deep, bitter chocolate taste which is so addictive and makes it a thing you’ll definitely have to eat before you die…


2. Laduree’s "Club Champs-Elysées"
Their famous macarons didn’t make the cut; see point 1. plus the fact that I may only list five, but Laduree’s Club Sandwich Champs-Elysées – toast with dried tomatoes, eggplant, grilled courgette, mozzarella, black olives, pine nuts, parmesan and rosemary and basil. Served with a simple mixed salad using very good quality olive oil, and Laduree’s French fries (a.k.a delicious crunchy potatochips…) – certainly did. Sounds maybe a bit strange to go to one of the best chocolatiers and order a sandwich, but try it and I know you’ll agree with me. It’s already a year ago that me and my mum ordered this delicious lunch, we went for my birthday to Paris for a weekend, and Paris was of course amazing. Since then I often think back to it and has it became one of my dearest memories.


3. kruidnootjes (ginger nuts)
Kruidnoten are a Dutch traditional candy and are being eaten for The Saint Nicolas Feast. In October the shops are suddenly loaded with them, even special brands, you can get them fresh from every bakery and behind each display-window you can see pictures from the Saint and his kruidnootjes for the children. It’s every time again special to receive them after a year waiting. These little crunchy cookies are full with flavour and it’s hard to stop eating.


4. my family recipe for oliebollen (doughnut balls)
Oliebollen are being made for the celebration of New Year’s Eve and you eat them with lots and lots of icing sugar. You can make them your self, but almost everyone simply buys them from a street booth. I find this every year again so remarkable; they’re over priced and the quality varies a lot - often they are old, greasy and tasteless. Our family recipe is on the other hand the best; every year we adapt it a little trying to get an even better bunch and we pack them with raisins, apple and citron. They are delicious. It’s a true tradition to make them and I can’t imagine starting the year without them. Of course you’ll find the recipe on January 1st on my blog…


5. The Liquid Lounge’s "Honey and Chili Prawn Skewer" in Puerto Banus, Spain.
Food always tastes better when you’re on holiday but this was without a doubt the best thing I’ve ever eaten. I’ve seriously considered jumping on a plain to go back. We were there on vacation and noticed right away this little, English bar/restaurant with their big leather chairs inside and nice relax atmosphere. It is already some time ago but I can still remember the lovely ambiance and the distinct, different flavors of my dish. The prawn skewer was served with Italian Noodle, peanuts, red pepper and a coriander salad. Sweet, spicy, soft, crunchy, hot, cold…; definitely a deserved spot on the list…


Okay, now it’s time to ask some other people worldwide for their list/experiences and am I supposed to tag again five bloggers, but feel free to join and share your list as a comment, I’m really curious for the outcome…!


- Anne from Anne’s food – Stockholm
- Mary from Alpineberry – San Francisco
- Nicky and Oliver from Delicious Days – Munich
- Jocelyn from KUIDAORE – Singapore
- Gilly from Humble Pie – Canada

Monday, August 21

Kinnie and Ftira’s

Bonģu! Yes, I’m back from my vacation to Malta. All-tanned and well-rested. I have had a wonderful time and am already missing my days of lying on a stretcher next to the pool, just listening to some music…

When we landed on Schiphol Airport this morning, a nice welcome was already waiting for us; rain, rain, and more rain. Grey skies with dark clouds and bitter coldness. Will put you definitely right back on your feet in the real world again after a week of dreaming and relaxing under a blue sky

Malta is the perfect place for your holiday if you want to rest, sunbathe, shop a little and rest some more. It’s an idyllic little island with an ideal climate; of course hot, but not at all stifling. All the time sunshine and a lovely little breeze so you get the chance to cool off a bit.
Upon the clean streets are cute English houses, all beautiful painted, little chapels, small family restaurants, trendy bistros and souvenir shops which we happily plundered.

For the evening we drove on one of the many historic, antique yellow buses, which are by the way rejected English buses. (You really shouldn’t think of the brakes and their condition when you’re on one of the chauffeur’s bumpy, high-speed rides and see the many saint figures, presumably for blessings and good luck next to him…)
We set off to Valetta or Sliema; shopped a little and had a nice dinner on one of the cities many terraces.

I loved sitting there, watching people go by and drink some delicious, cold Kinnie. Kinnie is very popular on Malta, alcohol-free and made from bitter oranges and a variety of aromatic herbs. Really refreshing and an excellent thirst quencher.
Having a freshly baked, good-filled Maltese Ftira paired with this made it perfect. This big, round, oven-baked bread with a 20 cm diameter looks a bit like a plain, toasted focaccia but has a thick dark crust and a deliciously soft white centre which Maltese call the galba, i.e. the heart. I especially liked the scrumptious, still slightly warm, tuna-Ftira; both sides of the sliced bread were coated with tomato puree, and after this packed with tuna, Maltese capers, onion, garlic and olives. finished with a good sprinkle of olive-oil, this turned out to be a simple, very filling and very tasty sandwich.

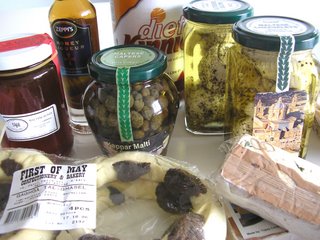
I also succeeded to be a perfect tourist and came back with a much heavier suitcase than I had on the way there - stacked with new clothes, souvenirs and local goodies; including a jar of Maltese capers, some traditional cured cheeselets, Maltese honey made from wild thyme, nougat, the famous honey rings (qaghaq ta’ l-ghasel) which turned out a bit to dry and disappointing, and of course a bottle of Kinnie!

We as well found a little book with more than 120 authentic Maltese recipes which I’m eager to use. Leafing through, I already found the recipes for a lovely Mqaret (datecake) and Kwarezimal (Lenten almond cake) which both look very tempting and promising.
And who knows, maybe they will bring back a bit of my “good-happy- vacation-vibe” and the “gone-away-from-everything-feeling”, when school and work starts all again next week…


Friday, August 11

GONE

YES!
Don't want to make anyone jealous, but...
I already packed my bags, and in a few hours i'm off to (hopefully) sunny and exotic

MALTA!!!!!!!!!

A whole week of just relaxing and getting tanned is planned… =)
Lying fabulously on a white bounty-beach among some palm trees, drink cocktails, read books, maybe some swimming, try local food, rest, and just have a nice break before school and all the other drama starts...

yum, yum...! =)
So, I’m gone for a week! But I’ll see U later, and hopefully I'll have some new Maltese recipes...

Thursday, August 10

Chocolate truffles


The remaining ganache which was standing in my fridge since I’d made chocolate-glazed gingerbread cakes (see previous post) I ended up using for some chocolate truffles. I know, not the most original post. But because they’re so delicious you’ll all forgive me, right?
Chocolate truffles are extremely rich and tasty, very easy to make and so much fun! You will feel like a real chocolatier; shaping and creating your own legendary bonbons, and everything, really I mean everything, including yourself, will be covered with chocolate and cocoa powder…indeed one messy process! (Or does this happen just with me?)
But I’m sure you’ll completely forget this when you’re finished and you’ll have a delightful homemade truffle in return… =)

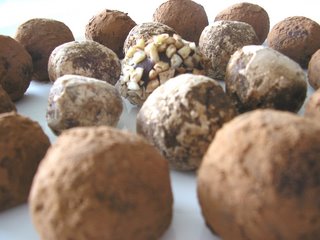
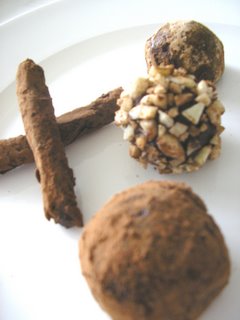
I made 3 different ones; one with a regular cocoa coating, one covered with a mixture from ground cinnamon and sugar, (this one was my favourite!) and the last one with a layer of ground hazelnuts -
They turned out beautiful and, of course, very tasty… (They’re ganache truffles; who doesn’t like that??)

After a bit of sampling, and my mom had another few more... - She really, really liked them; she just couldn’t leave them alone! - which made me of course in return happy; it’s nice if what you’ve made is been appreciated so much…-
Well, I packed “the leftovers” in nice, pretty, gift bags and gave them out as little presents. They looked wonderful and I must say, very impressive

Chocolate truffles

- 1 recipe for Chocolate Ganache (see previous post chocolate-glazed gingerbread cakes)
- 100 g bittersweet chocolate, chopped for coating
- +/- 50 g unsweetened cocoa powder
- +/- 50 g of chopped nuts – I used hazelnuts but just use what you like; almonds, peanuts or walnuts for example…
- 25 g cinnamon powder mixed with 25 g icing sugar


1. If you haven’t have the ganache already; make the ganache and let it stand for at least 2 hours, until firm. (or chill, covered, until firm)

2. Scoop, with a spoon, the truffle mixture into little balls (about 2 cm) and roll each one in your hand palms until round. Place them on a plate and chill the truffles thoroughly - the warmth of your hands will make them melt a little!

3. melt the chocolate in a heatproof bowl over a pan of simmering water (stir once in a while) and spread the cocoa powder on one plate, the cinnamon/icing sugar on a second plate and the chopped nuts on a third one.

4. When the chocolate is melted, take it off heat and let it cool slightly. take the truffles out the fridge.

5. Dip one hand in the melted chocolate. Pick up a truffle with your clean hand and place it in your hand covered in chocolate. Smear the truffle all with chocolate and then roll it through one of the coatings. Place on a plate and repeat this process for all the truffles. You’re done!

6. Truffles can be served immediately or can be refrigerated for up to 10 days.

Tuesday, August 8

Chocolate-Glazed Gingerbread Cakes


The small birthday party my niece gave this afternoon, seemed the perfect occasion for making a first birthday cake. Or in my case; really cute, single-serving chocolate-glazed gingerbread cakes from Martha Stewart’s Baking Handbook.

I remember starting very pleased preparing all my ingredients. Thinking how nice it was I’d finally be able to use the handy silicon mould for mini muffins that had been lying in my cabinet for over a year…

O boy, what was I mistaken. Martha already kind of instructed me to generously butter and flour the standard 12-cup muffin pan, tapping out excess flour and set aside…
But I ignored Martha and didn’t generously butter and flour the standard muffin pan.
In fact I didn’t even have a standard 12-cup muffin pan; I had a very cute, silicon muffin mould I wanted to use! And Martha, you should know you really don’t have to butter and flour silicon baking products…

Well, you do. The ginger cakes turned out all messed up, for ever glued to their forms and, to my absolute fury, very ugly.
Looking back I blame the molasses. I guess the sugar caramelized in the oven and adhered to the form sides. *Grrrr…*
This was my first little breakdown. What a mile pale!
It may have been prevented if I just had done what the book told me, but luckily it didn’t turn out to be my first cooking disaster... because I remained with a lot of batter after filling my cute little mould, I also filled a standard form and a petit cake tin. Well, Hallelujah! :)

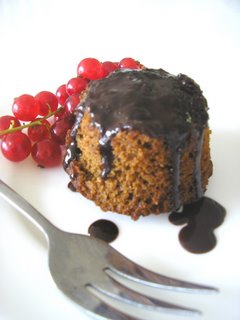
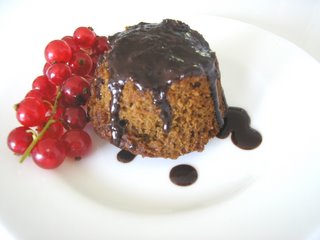
The result was a beautiful golden mini cake which I covered with thick chocolate ganache and decorated with some lovely little berries. A gorgeous birthday cake and a real success.

Besides, now I had the opportunity to sample and devour these little failures, which by the way tasted heavenly…
The cake was very moist and flavourful, with the wonderful, subtle taste of ginger and other spices. Very light and fluffy; forming the perfect base for the rich, heavy and divine chocolate ganache. In 1 word; delectable…!

Gingerbread cakes
(adapted from Martha Steward’s Baking Handbook. makes 12, can be baked a day in advance and kept in an airtight container at room temperature.)

- 5 Tbsp (60 g) butter, at room temperature, plus more for pan
- 1 ½ cup (215 g) flour, plus more for pan.
- 1 tsp baking soda
- 2/3 cup (157 ml) boiling water
- 1 tsp baking powder
- 1 tsp ground ginger
- 1 tsp ground cinnamon
- ½ tsp ground cloves
- ½ tsp ground nutmeg
- ¼ tsp salt
- ½ cup (150 g) packed brown castor sugar
- 1 egg
- 2/3 cup (230 g) unsulfured molasses
- 1 ½ tsp finely grated peeled fresh ginger
- 2 pieces crystallized ginger, thinly sliced lengthwise, for garnish. Or in my case: some summer fruit.


1. Preheat the oven to 350 ˚F. (175˚C) Generously butter and flour a standard 12-cup muffin pan, tapping out excess flour. Se aside.

2. In a small bowl, stir together the baking soda and boiling water; set aside.

3. In a medium bowl; sift together the flour, baking powder, ground ginger, cinnamon, cloves, nutmeg and salt. Set aside.

4. In the bowl of an electric mixer; beat the butter and brown sugar on medium speed until light and fluffy, 2 to 3 minutes. Add the egg, and beat until well combined. Add molasses, fresh ginger, and the baking soda mixture; beat until combined. The batter will look soggy but will come together once the flour is added. Add the flour mixture, and beat until well combined.

5. Divide batter evenly among the prepared muffin cups, filling each about halfway. Bake for about 20 minutes, until a cake tester comes out clean. Transfer to wire rack to cool for 15 minutes. Invert cakes onto rack to cool completely.

6. Spoon about 1 Tbsp of Chocolate Ganache over each cake, letting some drip around the sides and garnish. Once glazed, cakes can be refrigerated, in airtight containers for up to 3 days; bring to room temperature before serving.

Chocolate Ganache

- 1 cup (250 ml) heavy cream
- ½ pound (225 g) best-quality semisweet chocolate, finely chopped

1. In a small saucepan over medium-high heat bring cream to full boil, turn off the heat.

2. Add the chocolate, and swirl pan to completely cover it with cream. Let stand for about 5 minutes. Slowly whisk mixture until smooth. Let cool, stirring frequently.

Ganache will thicken as it sits. It should be pourable but still thick enough to coat. If not, place the bowl of ganache over a pan of simmering water and stir until it reaches the right consistency.

Monday, August 7

The Perfect Scone - the recipe

OK, I didn’t prepare ALL the different recipes I’d found and wanted to make from books, magazines and the internet, cause frankly, I was quite sick of it. But this last couple of days I have made:

Scones without, with a few, and scones with a lot of raisins.
Scones with milk and scones with buttermilk. (3 different recipes with all a different amount…)
Recipes with a lot of butter/sugar/flour and recipes with not much butter/sugar/flour.

I’ve made recipes which resulted in a soggy bunch, scones that were too dry and fell right away apart, pale ones, burned ones and a couple which tasted rather good actually, but nothing like a scone.
I’ve made light and heavy ones and I’ve experimented with the brushing; milk, buttermilk or egg yolk. (which doesn’t make the slightest difference by the way…)

After 3, I must say, very busy bake-days, I finally came up with a recipe that kind of looked like the ones I wanted - They weren’t close to being perfect yet, but he, NOW it could go somewhere(!)
So I made them again, now with more raisins, a bit more flour (I wanted them to be dry…) and a lot less butter (the previous ones were far to buttery; they had a heavy, greasy smell and aftertaste, I wanted them to be a bit more neutral)

Well, 10 minutes in the oven + 3 minutes under the broiler later…HURRAH !- I HAD MADE THE PERFECT SCONE!

They were light, dry and scrumptiously crumbly. The inside just fluffy and moist enough, with a golden brown coating and a delicious crispy, buttery crust.
Scones with just enough raisins, a wonderful aroma, gorgeous colour and trust me, the best flavour ever.
Best to eat freshly baked of course, still slightly warm, with some (homemade) jam and a nice cup of tea…


The recipe for the best scones ever:
(makes 6 big ones)

- 225 g self-raising flour
- a pinch of salt
- 40 g granulated sugar
- 50 g cold butter, cut up in little pieces
- 75 g raisins (or other dried fruit)
- 1 egg, beaten
- 3 Tbsp milk

1. Preheat the oven to 220˚C and line a baking sheet with parchment paper.

2. In a medium bowl, sift the self-raising flour with the pinch of salt, and add in the sugar.

3. Add the butter and crumble this, using your fingertips, through the flour until you have a fine texture, looking a little like rough breadcrumbs.

4. Mix in the raisins and stir in the egg and the milk. The dough will now be very quickly ready. Knead it a couple of times, but don’t overwork it. The dough should now feel soft and can easily be formed into a ball.

5. Divide the dough into 6 round little balls, flat the top and shape them so they’ll be about 2 cm high and have a diameter of 7 cm.


6. Brush them with a little milk/egg yolk (doesn’t matter which) and bake them for 10 minutes.

7. They don’t have their beautiful colour yet, so turn on the broiler for 3 minutes.

8. Now they are perfect. The bottom and outside are golden brown and the inside fluffy and delicious. They can be stored at room temperature for a few days or you can freeze them, but best to eat immediately.

I hope you’ll try them, and agree with me…let me know! :)


Saturday, August 5

Spanakopita (Greek spinach pie)

Because my inquiry for The Perfect Scone is still full going, I unfortunately have to report that it’ll take a bit longer. But don’t worry, results are still being booked and with every adjustment there is improvement.
(the only backside is that every day I stumble on more and more recipes...)

In the meantime I though it might be nice to share the recipe for Greek spinach pie with you guys; my ultimate favorite dish.


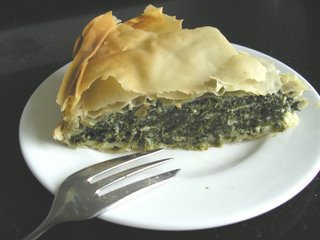
Just look at it; it’s perfect.
I simply can’t resist it; even now I’m already a little drooling…
It’s the best food you can EVER serve me. (OK, this is maybe a bit of an overstatement; I can change my mind on this later on, with al the recent baking, but for NOW it certainly is!)

When I have a slice, I think of my vacation to Greece, where I first tasted this delicious tart and ate it happily and relaxed as lunch in the cafeteria by the beach… *sigh*

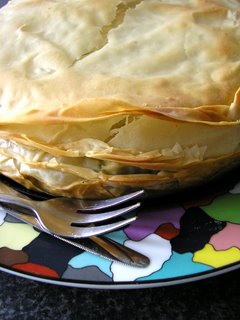
The phyllo dough is wonderfully crisp (but not hard!) and dry and becomes beautifully golden brown in the oven. This paired with the slightly moist and overwhelming strong and rich taste of spinach is magnificent. Its very light and compact pastry and it’s very nice to serve on a party buffet. I like it best when it’s served cold.
The leftovers (if there are any…) are as well delicious to eat the next day; the spinach becomes than even stronger and the puff pastry will be slightly softer and oozier. Best to serve straight out of the fridge.

Greek spinach pie


- 3 Tbsp olive oil + more for brushing
- 1 large onion, chopped
- 2 cloves garlic, minced
- 1 bunch green onions, chopped
- 1 kg spinach, rinsed and chopped
- a handful fresh parsley
- 2 eggs, lightly beaten
- 125 g ricotta cheese
- about 125g FRESH feta cheese, crumbled
- 8 sheets phyllo dough

1. Take the phyllo dough out of the freezer, preheat oven to 175˚C and lightly oil a 24 cm (or a bit smaller…) round spring form.

2. Heat 3 Tbsp olive oil in a large pan on medium heat. Sauté onion, garlic and green onions, until they’re soft and lightly browned. Stir in, in parts, the spinach and parsley, continue to sauté until the spinach is limp. This will take about 5 minutes. Add salt and pepper to taste. Remove from heat and set aside to cool.

3. In a medium bow, mix together eggs, ricotta and feta. Stir in the spinach mixture.

4. Lay one sheet of phyllo dough in the spring form and lightly brush it with olive oil. (do this carefully, it’s important that every part get brushed!) Lay another sheet on top of this, brush with olive oil and repeat this process until you have 4 layers of phyllo dough. (it doesn’t matter if the sheets cover a bit of the pans sides)

5. Spread spinach mixture into the pan. Layer the remaining 4 sheets of phyllo dough on top of this, each carefully brushed with olive oil. Tuck overhanging dough into the pan to seal the filling.
6. Bake for 40 minutes, until golden brown. (I my case this doesn’t happen, so I also put the broiler on for about 10 minutes.) Take the pie out of his form and serve hot or cold.

Thursday, August 3

The perfect scone…

Last month, I went on vacation to Brighton for a week. (Britain) It was my very first holiday on my own and I’ve had such a fantastic time…
(It was an organized trip for teens which came with an intensive English course; this means I had 6 hours a day lesson... - seemed handy for my blog!)
I stayed in a youth hostel with people from roughly 60 different countries (!) and met some really nice people…

What I especially miss about my trip is my morning ritual I developed over there. Since the food we got served was just AWFUL, every morning, after the others had theìr breakfast and I’d had my first cup of coffee, I would walk to “the little village bakery” across the street and ordered a perfect breakfast: 2 delicious, freshly baked fruit sconesScones served just out the oven with an absolutely perfect texture, an amazing taste, wonderfully dry and o so crumbly; these were without a doubt the best scones I had EVER tasted. Now, back home, completely scone-less and slightly depressed, I have decided to find out the secret of this perfect scone and ‘ll get the recipe!
Although it’s very simple to make scones, I have already come across about 100 different recipes, all claiming to make the perfect one…
…With sugar or sugarless, with milk, a mixture from milk and water or buttermilk, adding no eggs, just one, or many, and how much flour? and what about the amount of butter???...
Kind of frustrating and really not helping!

OK, maybe it’ll take some loads of scones, but I will post the perfect scone recipe! :)
If anyone has any useful tips (or perhaps already the perfect recipe…) please be so kind to leave a comment! :)

Tuesday, August 1

Orange-Apricot-Walnut bread

The ultimate best thing of having vacation is that I have all the time to nose through my cookbook collection, search peacefully for my perfect recipe, prepare all my stuff untroubled and start baking in complete harmony, of course still wearing my pyjamas, filling the house with lovely, sweet aromas.
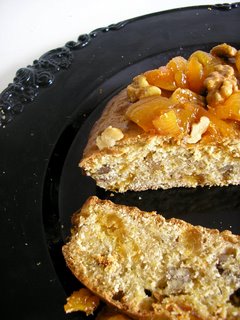
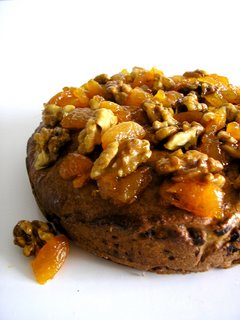
And today, a new free day, I was in the mood to make this absolutely gorgeous orange-apricot-walnut bread.
This pandolce is another recipe from La Dolce Vita and is normally being eaten on Easter.

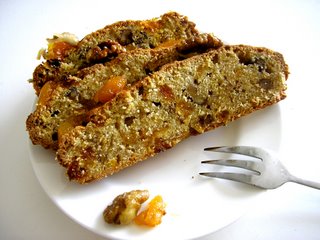
It is a deliciously, just perfect bread packed with flavor. The orange rind really gives it a unique taste. It’s soft, with a good crunchy crust and so beautiful with that topping. Because of the great amount of nuts and fruit, the bread is dry and compact, but at the same time moist and soft. Easy, healthy and very tasty!


Orange-Apricot-Walnut bread

- 115 g dried apricots
- rind of one unsprayed orange
- 55 g butter
- 10 g fresh yeast or 1 tsp instant yeast
- 200 g flower
- 75 g fine granulated sugar
- 55 shelled walnuts, chopped
- 2 eggs, beaten
topping – I doubled the amount; otherwise it was too dry - :
- 2 Tbsp honey
- 4 Tbsp orange juice
- 25 shelled walnuts
- 6 dried apricots

1. Preheat the oven to 180°C and grease a 18 cm springform cake pan.

2. Cut up the apricots and grate the orange till you have all the rind.

3. Put the fruit with the butter in a saucepan and bake on low heat until all the butter is melted. Then remove the pan from heat.

4. Mix the yeast with 2 Tbsp warm water and combine this mixture with the flour, sugar and chopped walnuts. Whip in the eggs, the melted butter and the fruit until well blended. Pour this mixture in the cake pan and bake for 1 ¼ hour, until golden and dry.

5. Take the bread out of his form and let cool.

6. Make in the meantime the topping. Bring honey and orange juice to boil and leave 30 seconds, while stirring, simmering.

7. Put the walnuts and the apricots in the pan and warm them, on low heat, for about 1 minute. Place the nuts and apricots nicely on the bread. Let cool completely.